| Build History Phase 3 | ||
|
Background Plans
Adapter Plate Other changes required
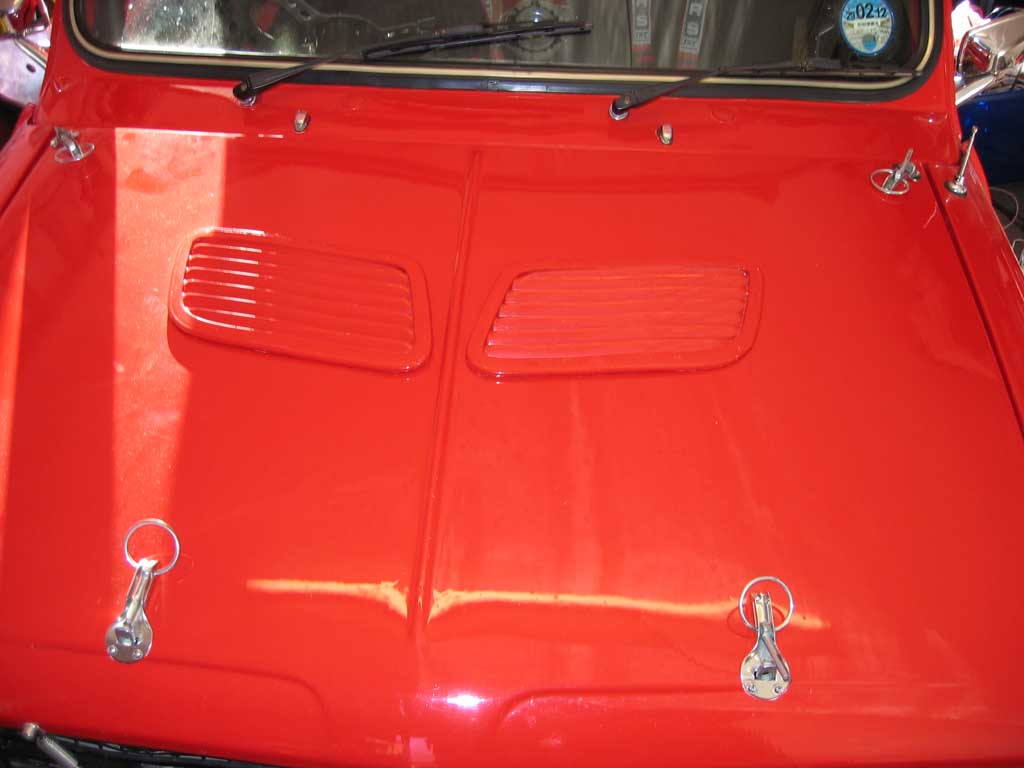
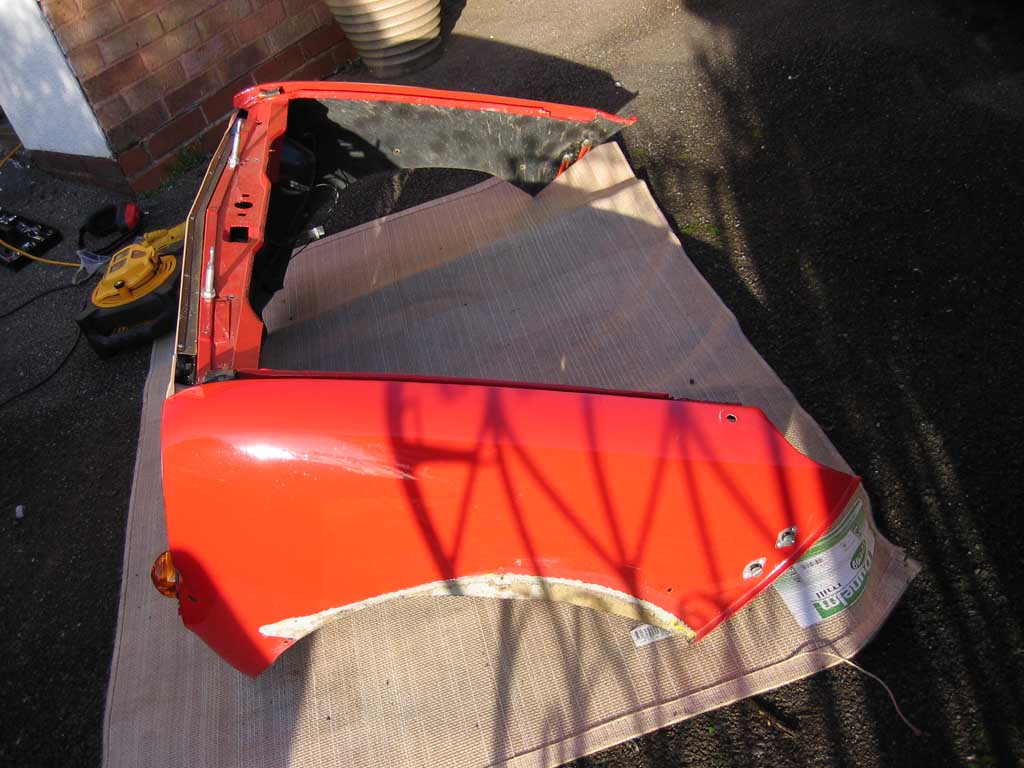
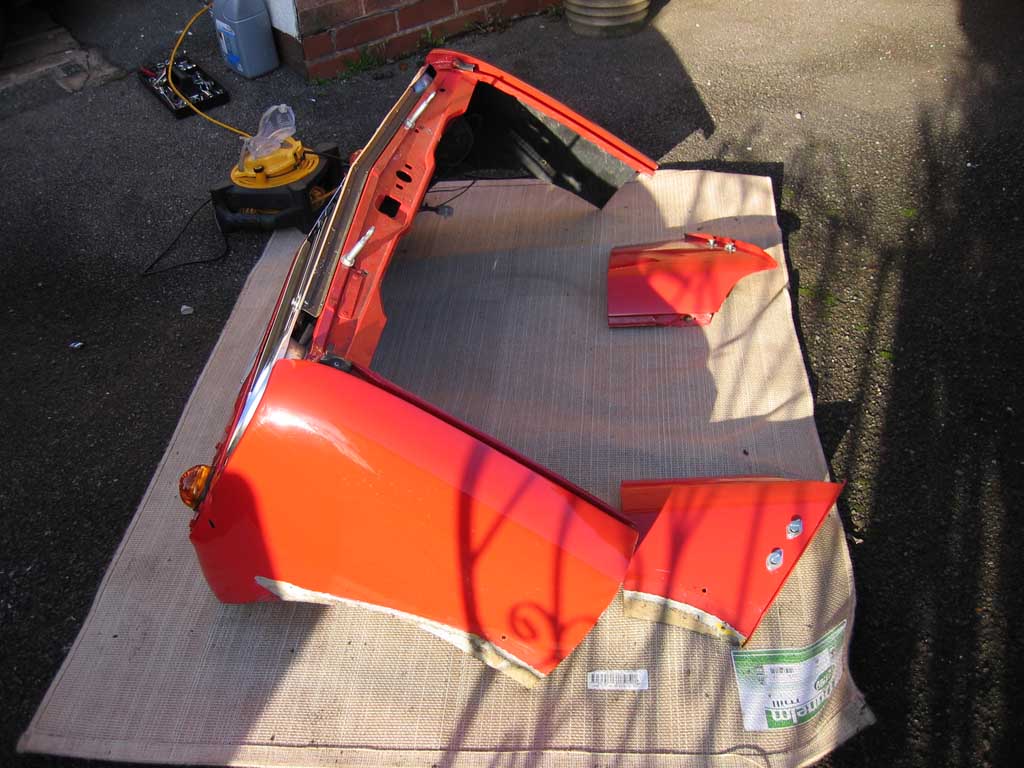
Extending the Wings Extending the Bonnet
Making Room for it all Other changes required
Cold air intakes Intercooler \ Piping Protecting the bulkhead
Boost Gauges Exhaust Temp Gauges New 225/45x13 Toyo 888's
|
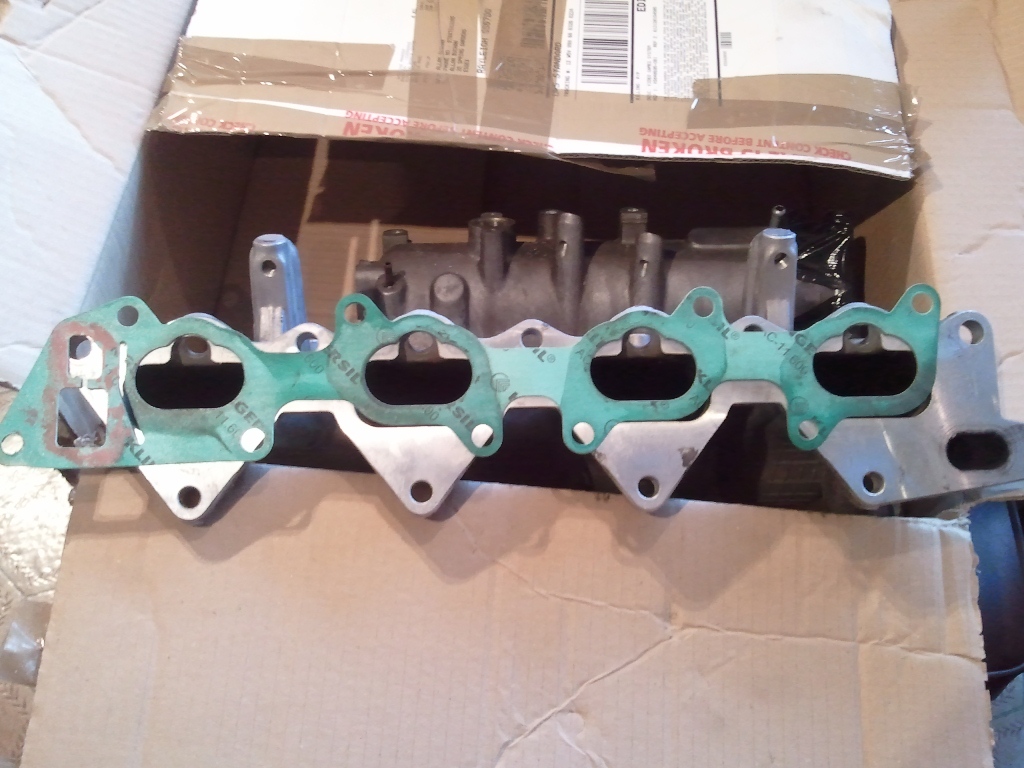
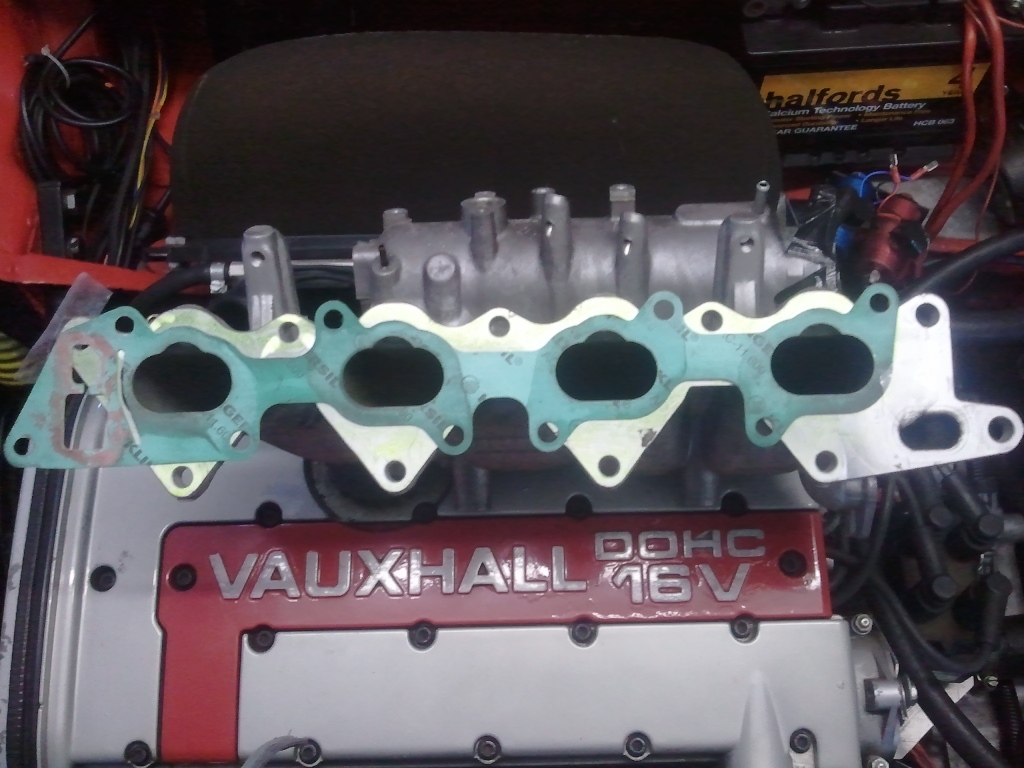
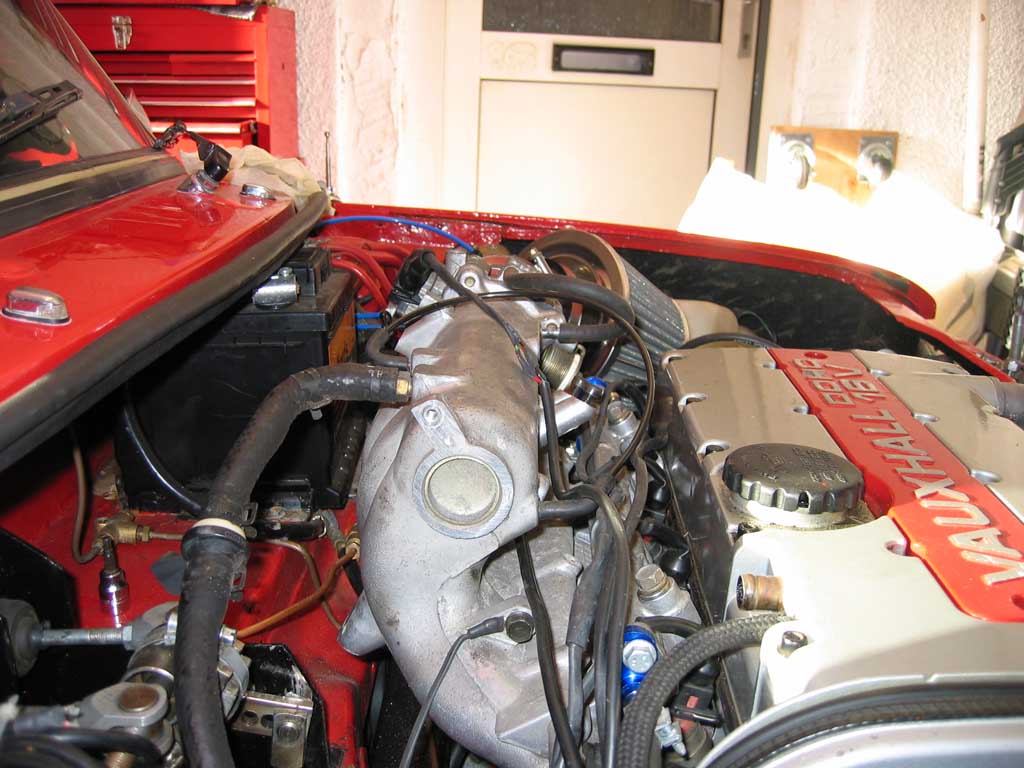
This section will detail the conversion to forced induction along with the upgrades to other components to cope with the extra torque available. (Click on pictures to see larger version) Why go Turbo and strategy to fit into the cramped engine bay When the project was initally started the car was due to remain manual and due to this I prefered the instant on of the nitrous after each gear shift rather than waiting for the turbo to spool again. Now that I have moved onto automatics there is no need to lift off the throttle between gears which has eliminated the problem apart from the initial launch. One of the major problems with the 2l XE in a mini is that the stock vauxhall manifold will not clear the bulkhead or the centre crossmember on most of the frames available for the conversion. A remedy for this was to box in the QED Throttle bodies but there was was so little space available that this would be near impossible or use components from other manufacturers that don't have the same design shape as the vauxhall inlet, from other forums it was found that the Mitsubishi Evo exhaust manifold was an almost exact match to the vauxhall one (with regards to port spacing requiring only a replacement flange) so I thought maybe the inlet would be similar. The Evo inlet didn't use the long intake runners as with the vauxhall one and as such didn't foul on the bulkhead or the subframe and the port spacing looked pretty exact. It wouldn't be quite so simple as the exhuast side though as the ports were a much larger diameter and also due to injector location would be difficult to use the same approach as is taken on the exhaust side with simply a new flange welded on. Another bonus of the Evo inlet is the stock throttle assembly has a much larger diameter than the stock vauxhall setup (a stock Evo manifold can easily flow up to 450hp). You can see in the pics how close the port spacing is and also get an idea of the size difference compared to a stock vauxhall inlet gasket.
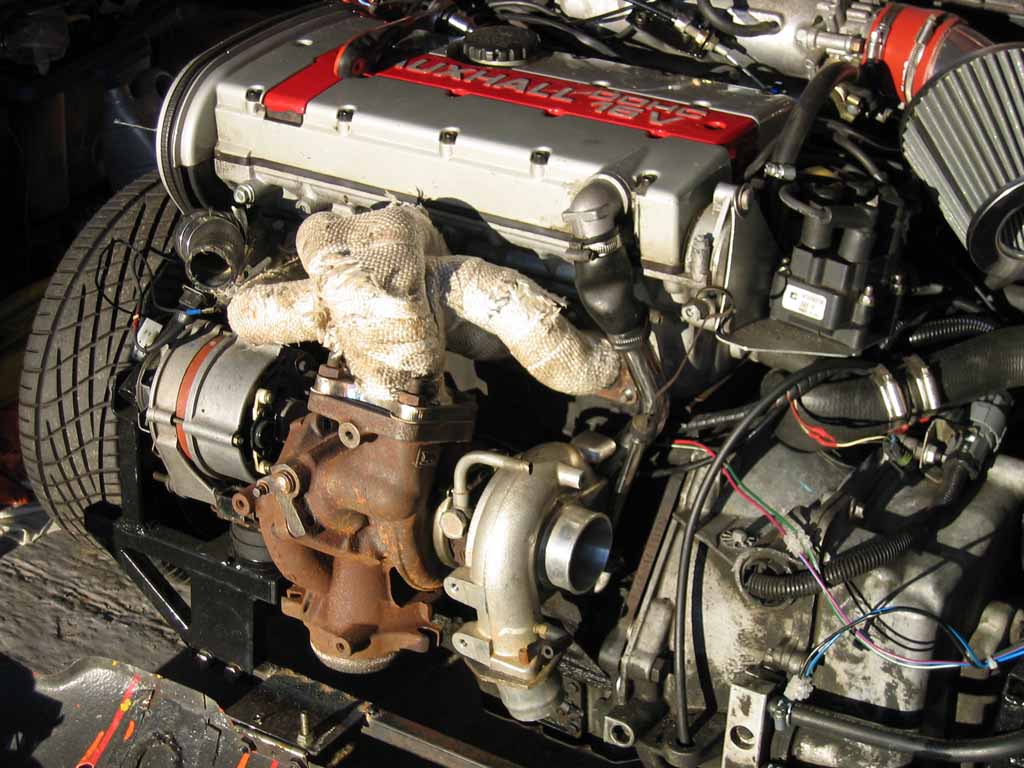
The Evo TD05 Twin Scroll Turbo has already been proven on several Vauxhall conversions, the flange is a straight swap from the Vauxhall exhaust manifold to the Evo manifold (these are available off the shelf and fitted to an Evo exhaust manifold you supply for about £50) so there won't be much detail on that part. The TD05 Twin Scroll unit is ideal for my requirements, it can easily flow up to 350+bhp without stress and also due to the Twin Scroll design it has very little lag so launching with the auto's shouldn't be an issue.
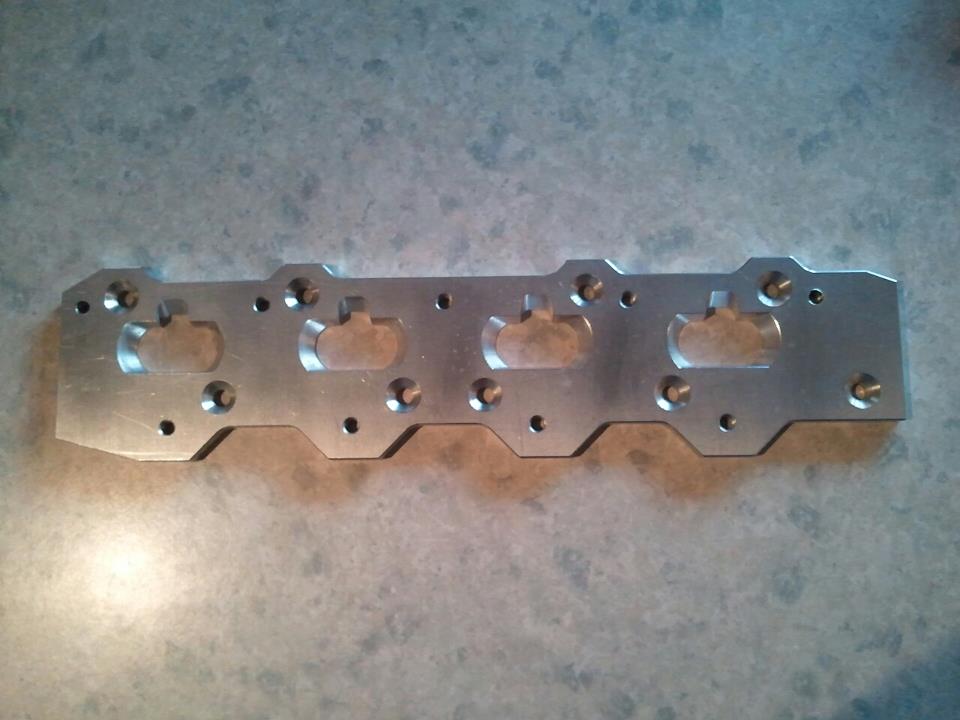
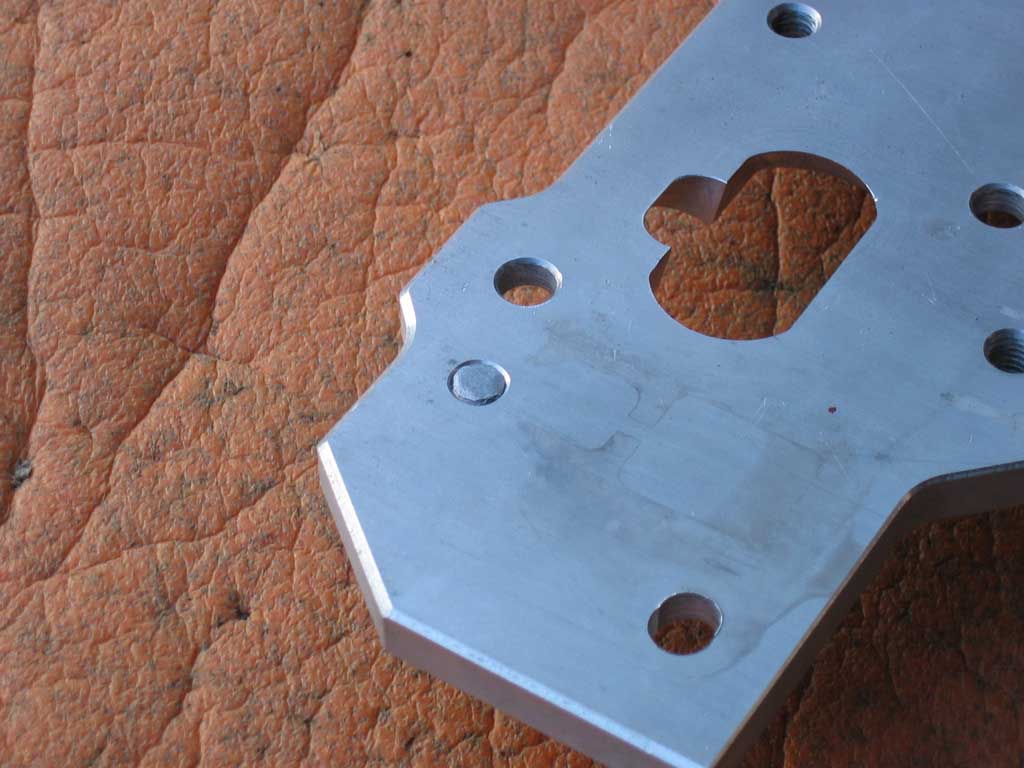
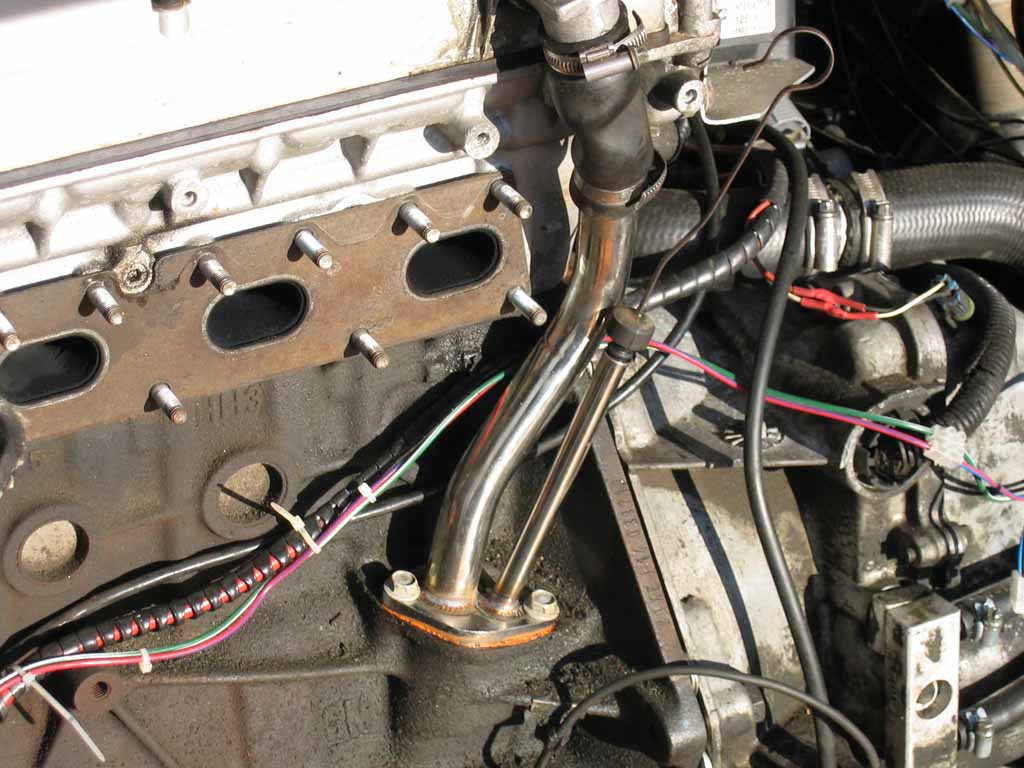
I decided that the best approach would be to create an adapter plate that would sit between the head and the manifold which blended in the port shapes and provided the correct bolt pattern to attach the Evo manifold. This section covers the front and rear installations as they are pretty identical. This is the prototype adapter plate
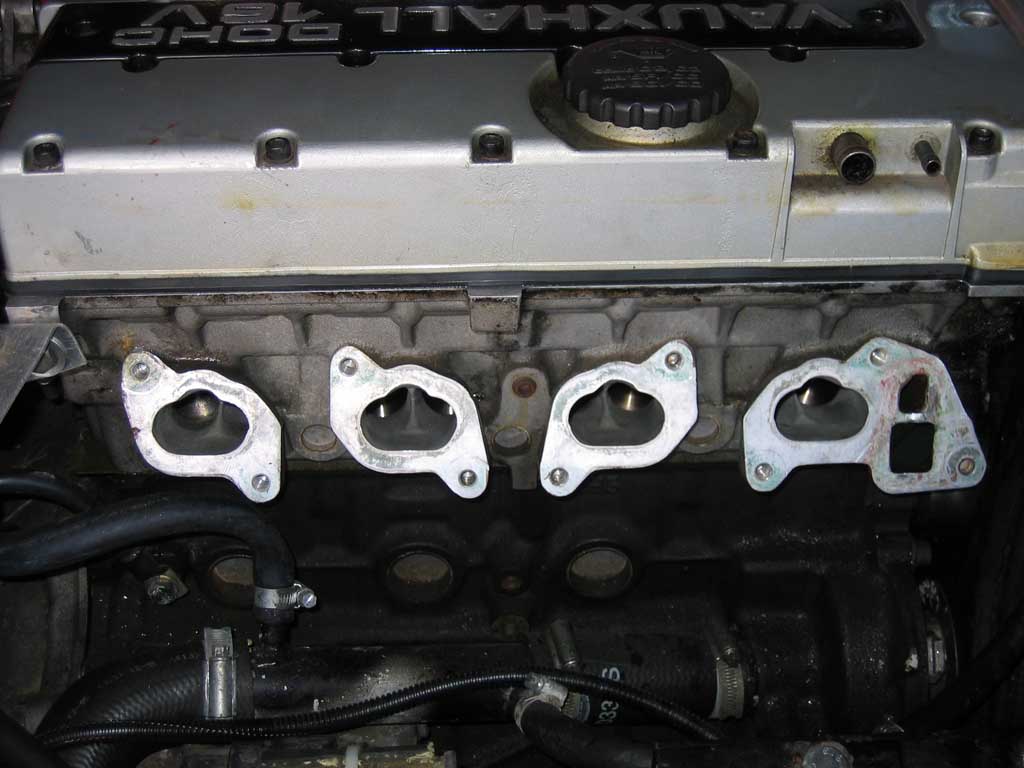
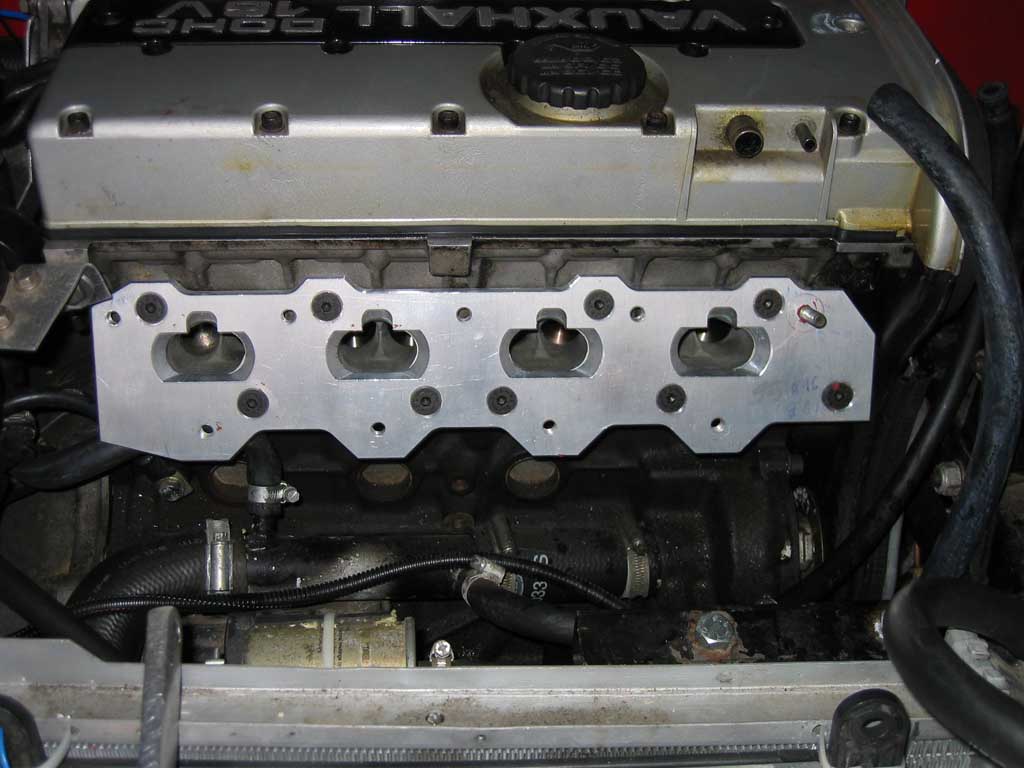
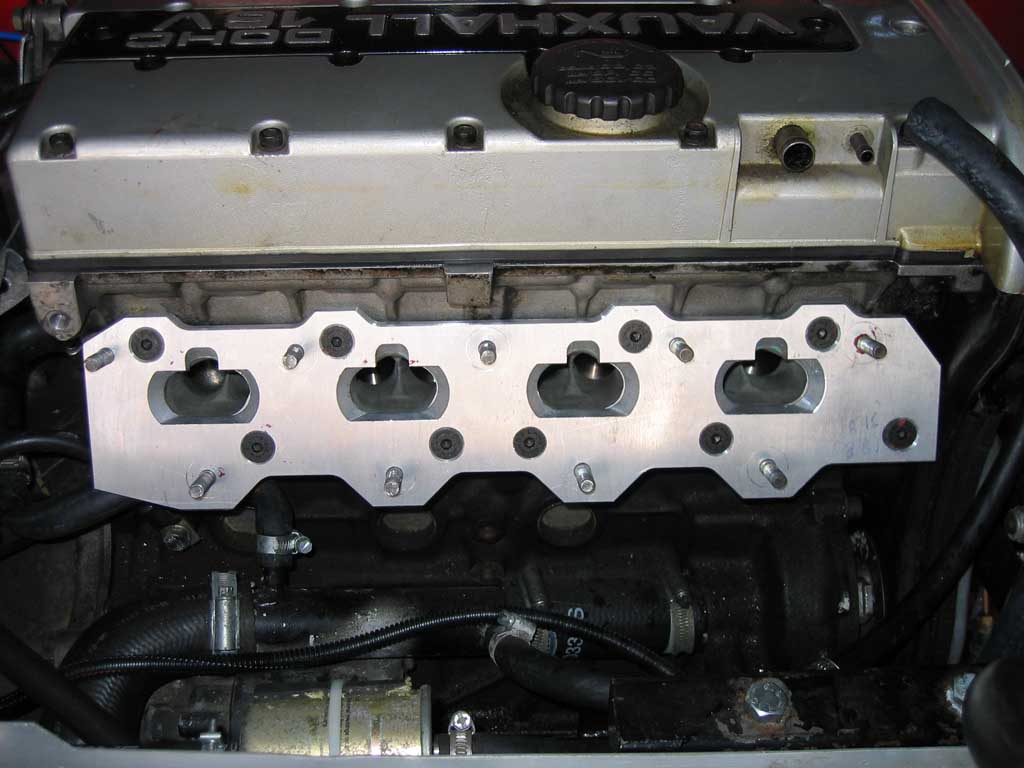
These are pictures of the adapter plate in the various stages of fitting, you can see that I have used countersunk hex drive bolts to attach the plate to the vauxhall head and then normal studs will be used to attach the Evo inlet. (these have been done on CAD\CNC so can be replicated for £130 each including the coutersunk bolts\postage, would be cheaper for a batch, drop me an email if you are interested. Email link at bottom). In picture 2 you can see that the inlet stud should be filed flush with the back of the plate and some gasket sealer (or similar) used on the threads as this stud overlaps the water outlets on the head.
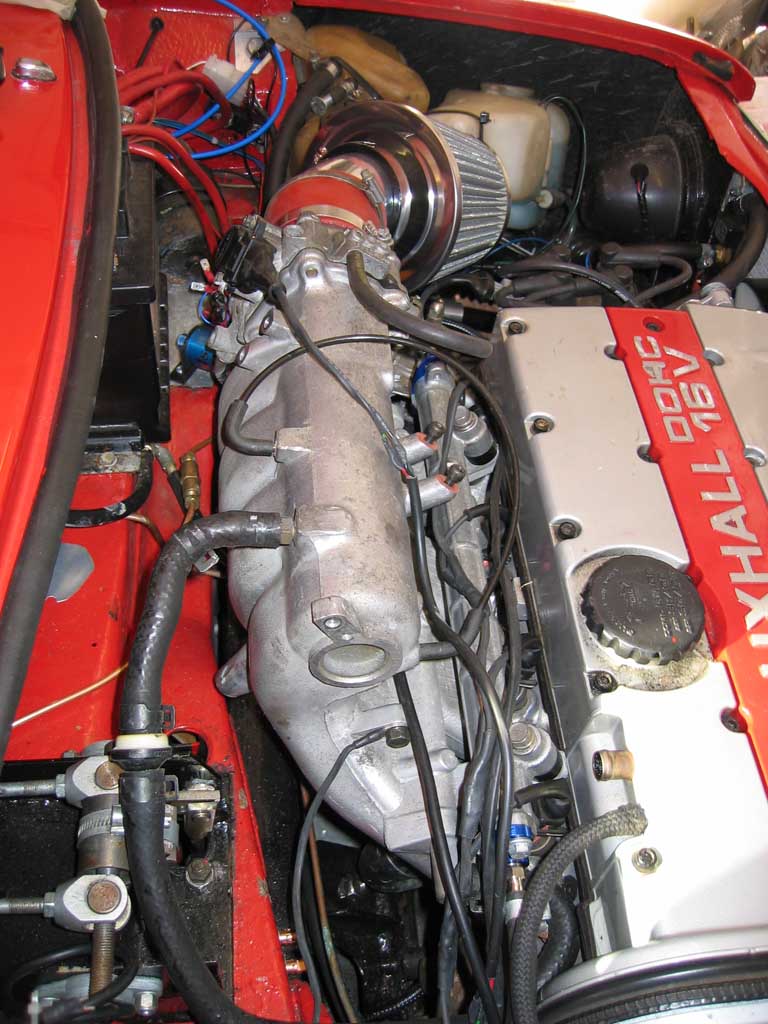
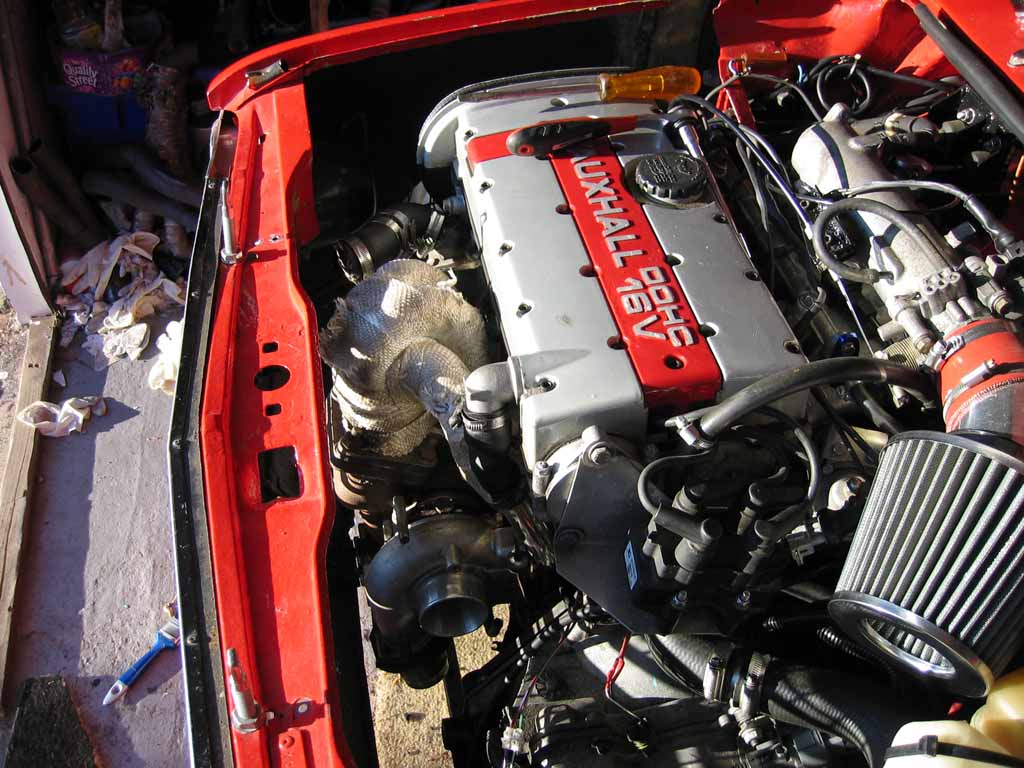
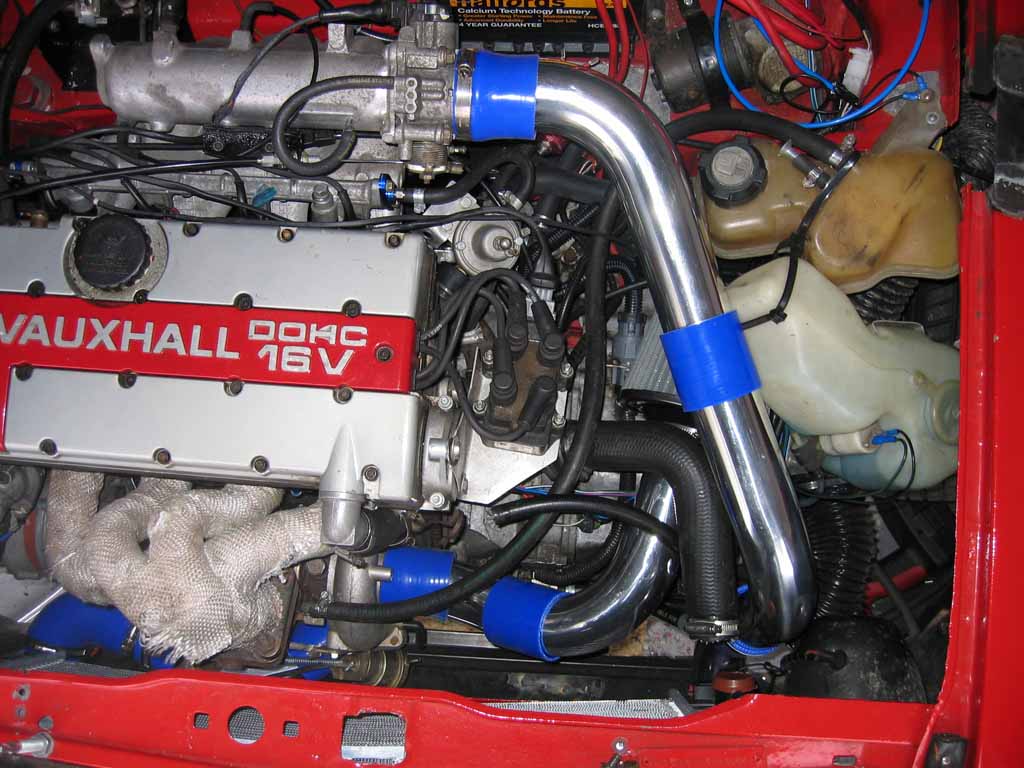
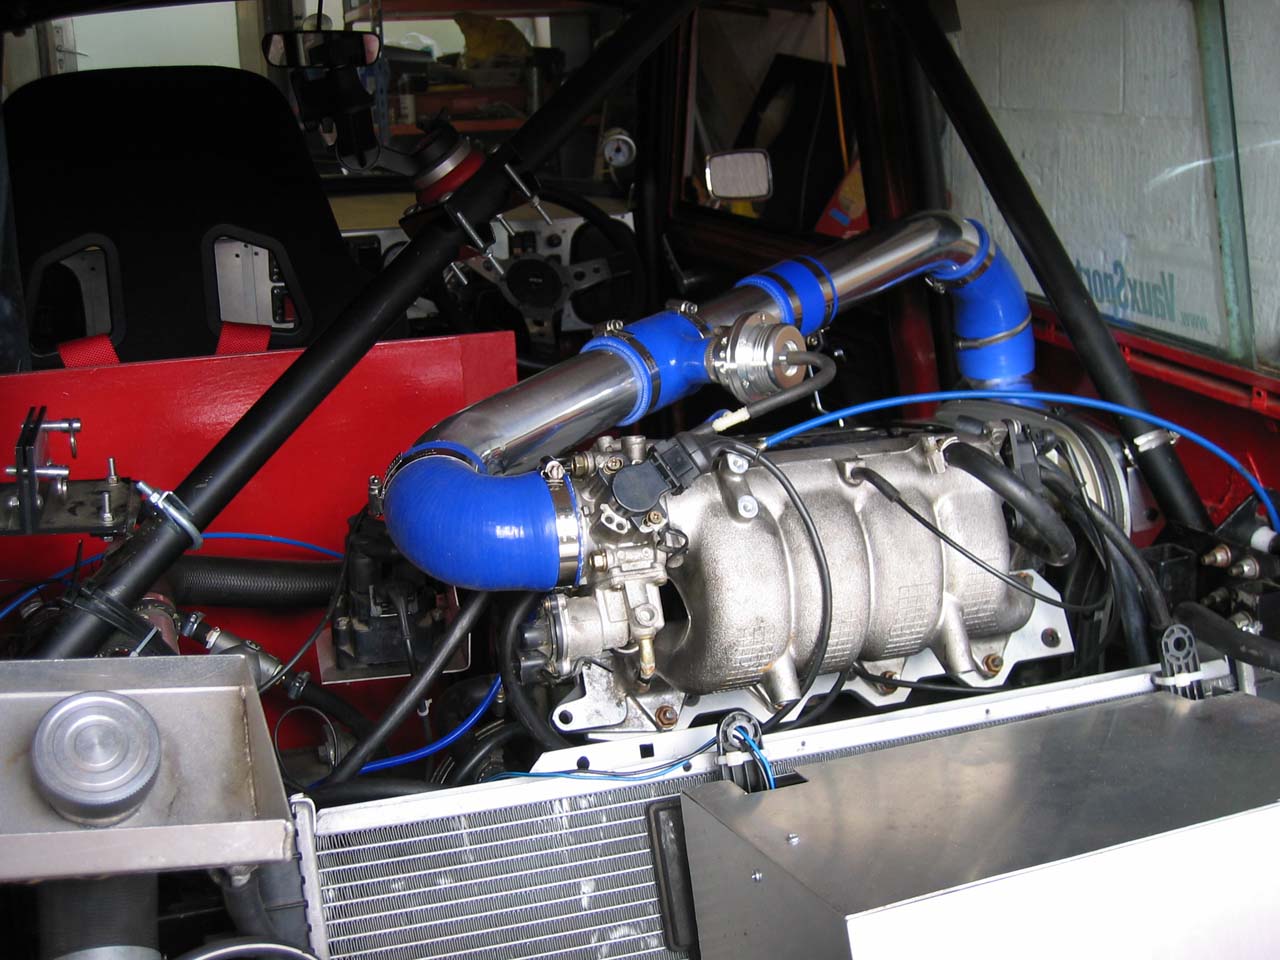
When fitted you can see just how easily the Evo inlet clears the bulkhead and is looking good, a side bonus to this setup is being able to remove the inlet without losing loads of coolant since the plate remains in place once fitted and keeps the water seal in place. The only change that I found was needed to the Evo inlet was to slightly file the top of the lugs that hold the fuel rail in place as these fouled on the cam cover seal since the Vauxhall cam cover is quite a lot wider that the Evo one. I have temporarily fitted an air filter so that I am able to do some quick road testing before moving onto the turbo install. The 3rd pic is the throttle cable adapter plate that was made since my Evo manifolds hadn't been sold with the stock plate installed. The inlet does sit quite high compared to ITB's but doesn't cause a problem with the bonnet fitting ok.
I will be tidying up the pipework at a later time since some of the vacuum connections will be used for sensors etc when the turbo is added but are temporarily blanked off with whatever was lying around in the garage initally in order to test the running. I have also found that the 560cc Evo injectors can be used with the DTA E48 ECU since although the injectors are low impedance so cannot be used straight with the E48 the stock Evo ECU is also not able to drive low impedance directly so a resistor pack is used, due to this I was able to add a 2ohm 50watt resistor to the DTA injector wiring and make use of the Evo injectors successfully. With a quick flow calculation the flow of the 560cc injectors at 3bar needed approx 50% of the original duration to match the Vauxhall beige injectors at 3.5bar so 50% was removed from the fuel map and the car started up 1st time :o) My concerns about the Evo idle valve were cleared as this is fully closed when not powered (unlike the Vauxhall Bosch ones that go into a limp mode which is open).
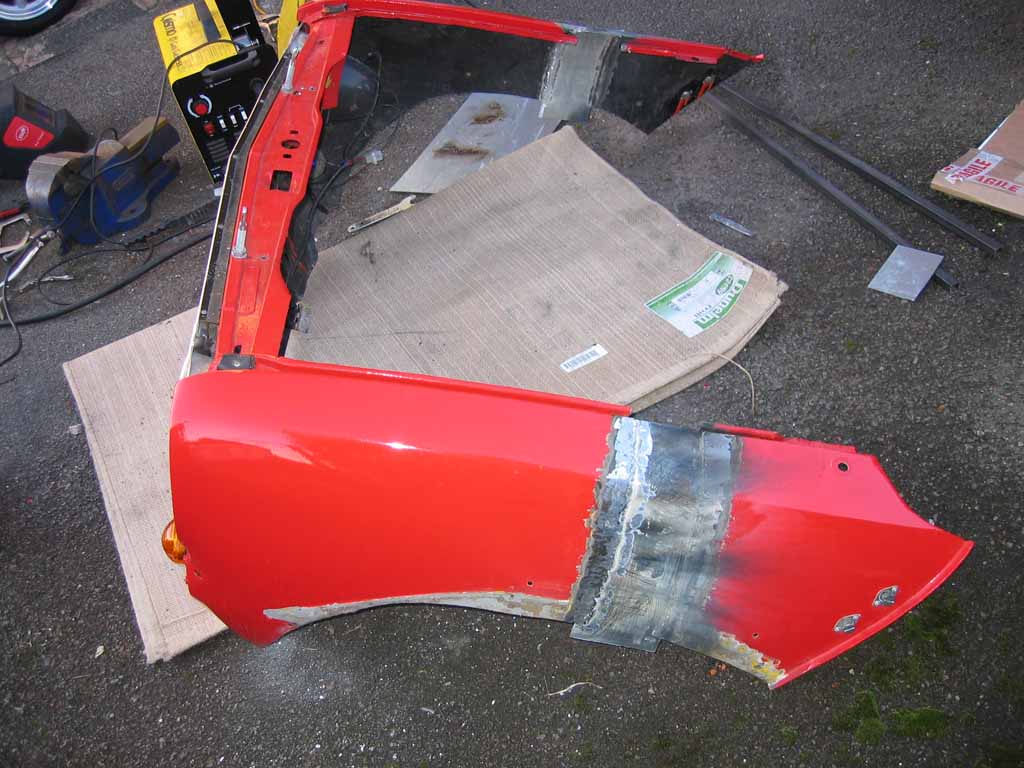
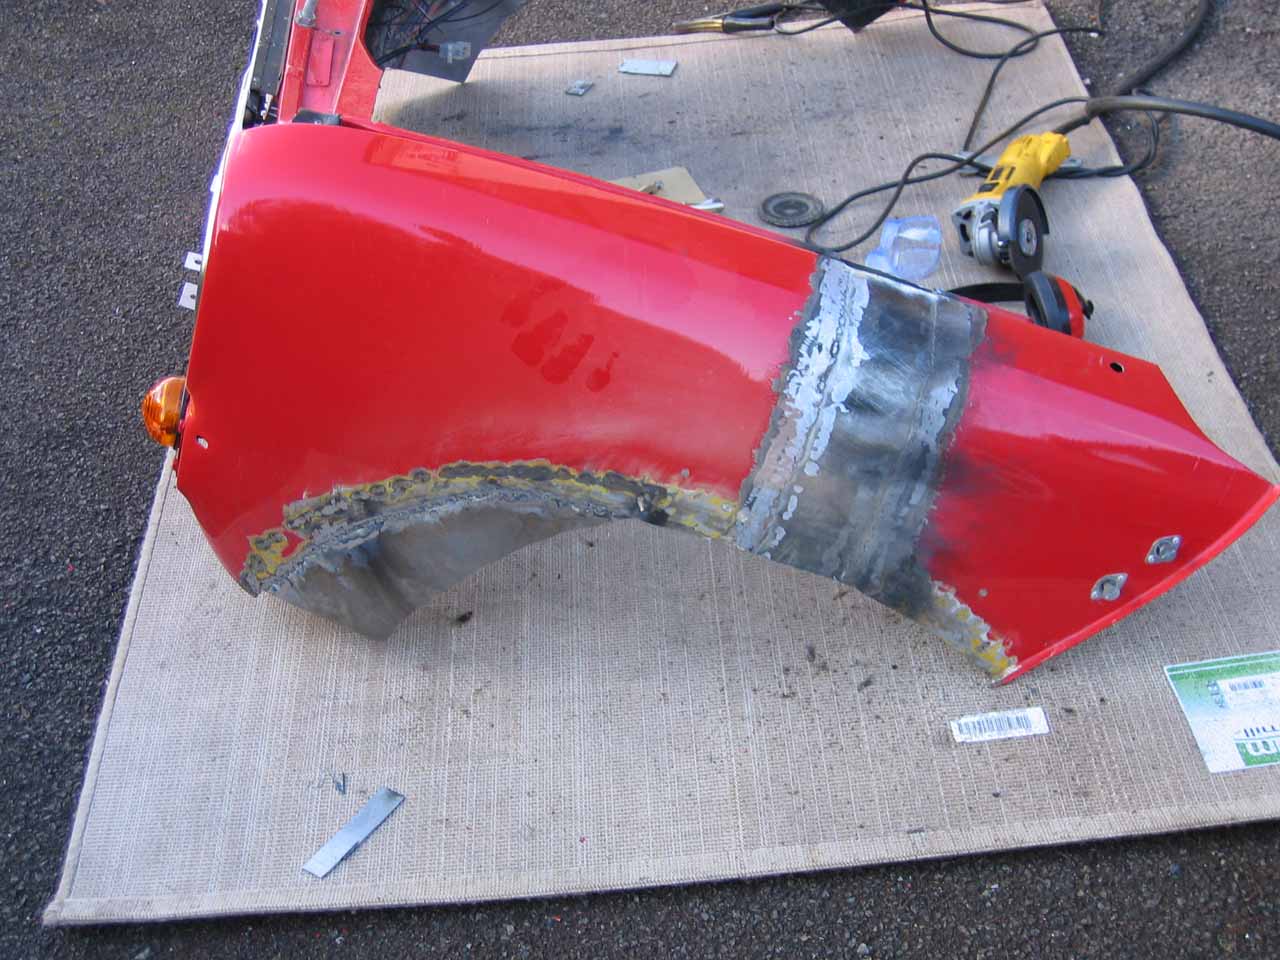
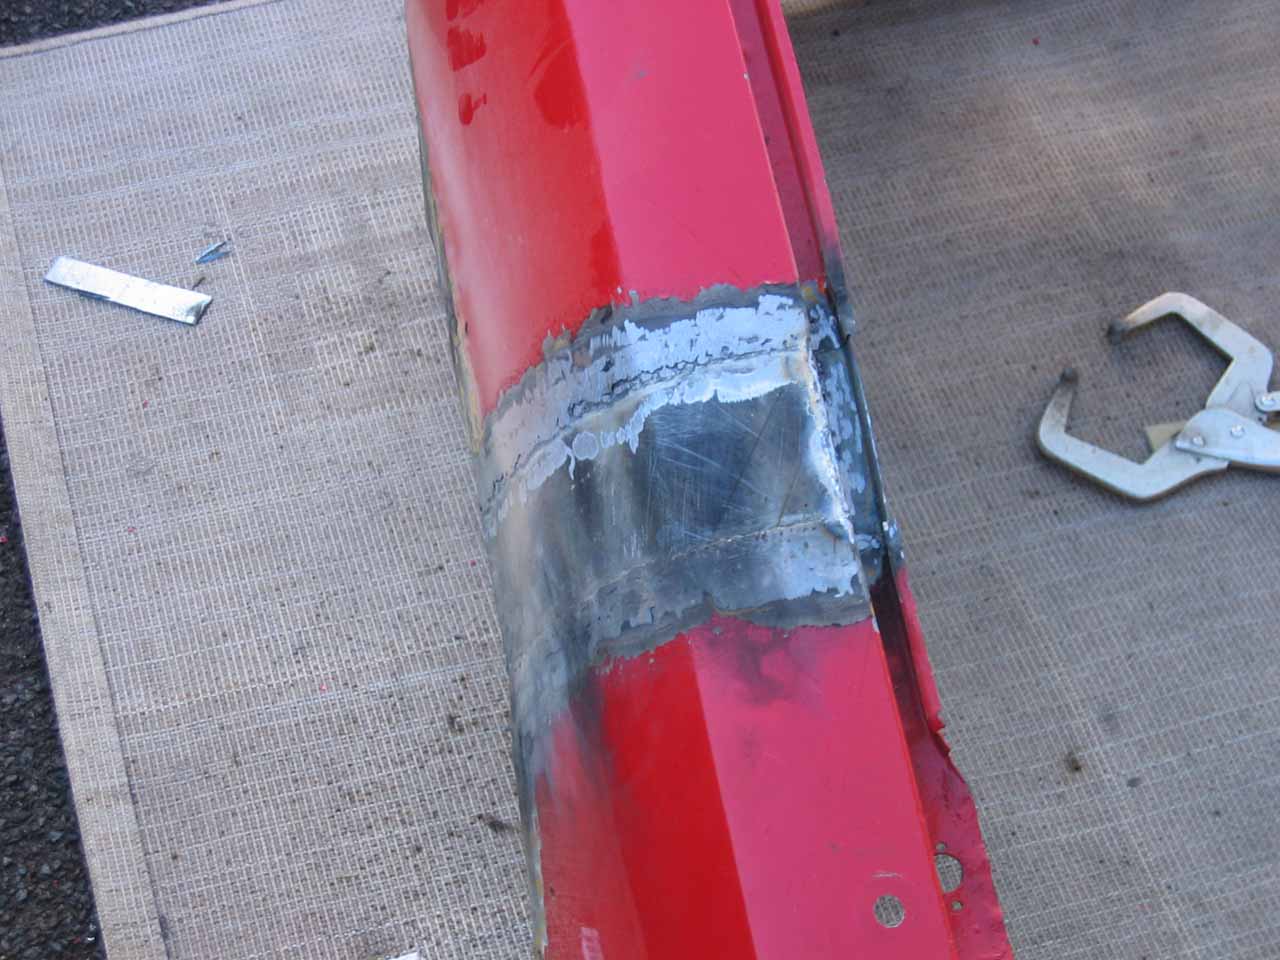
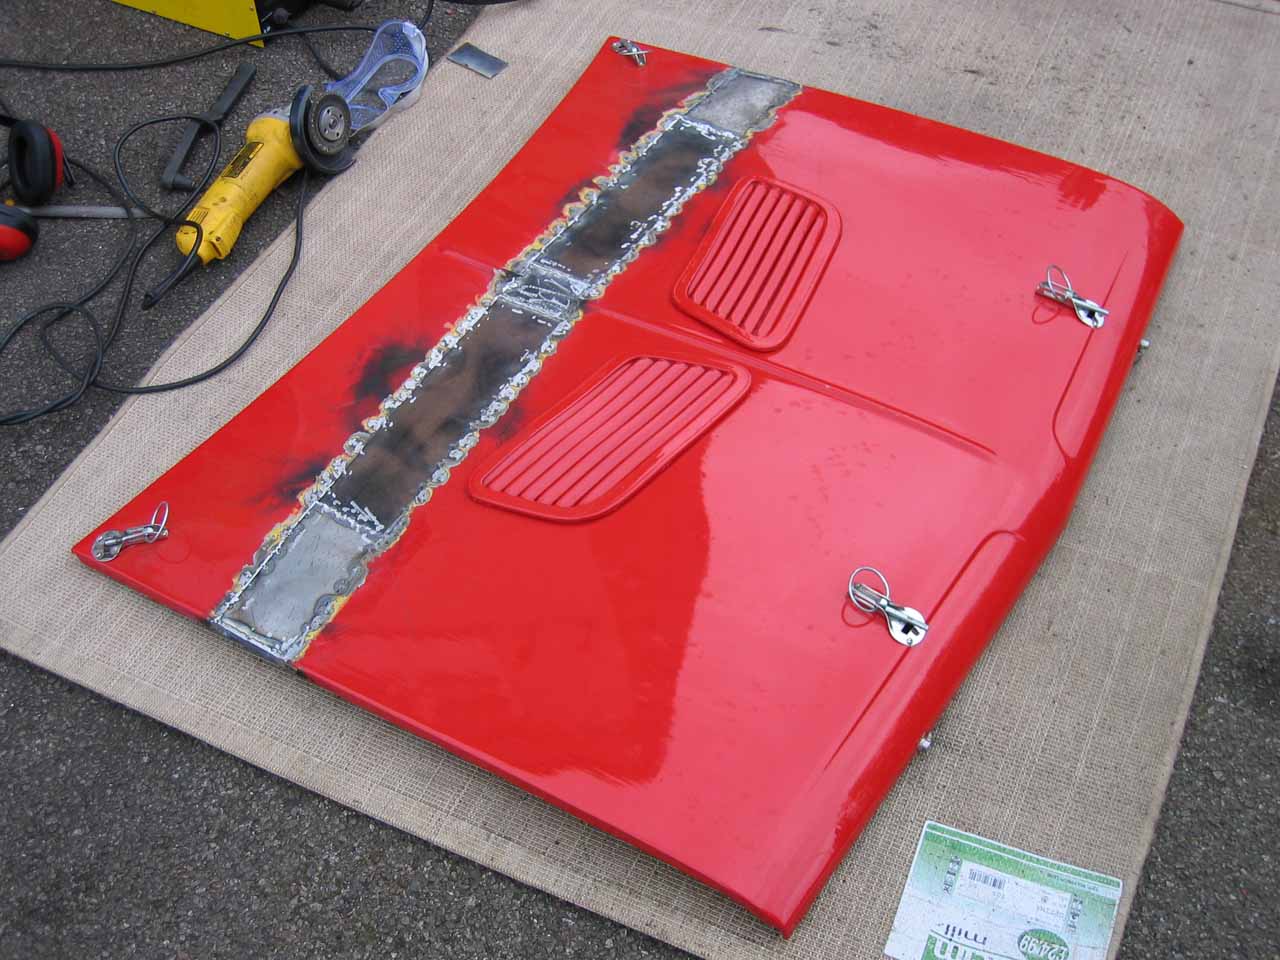
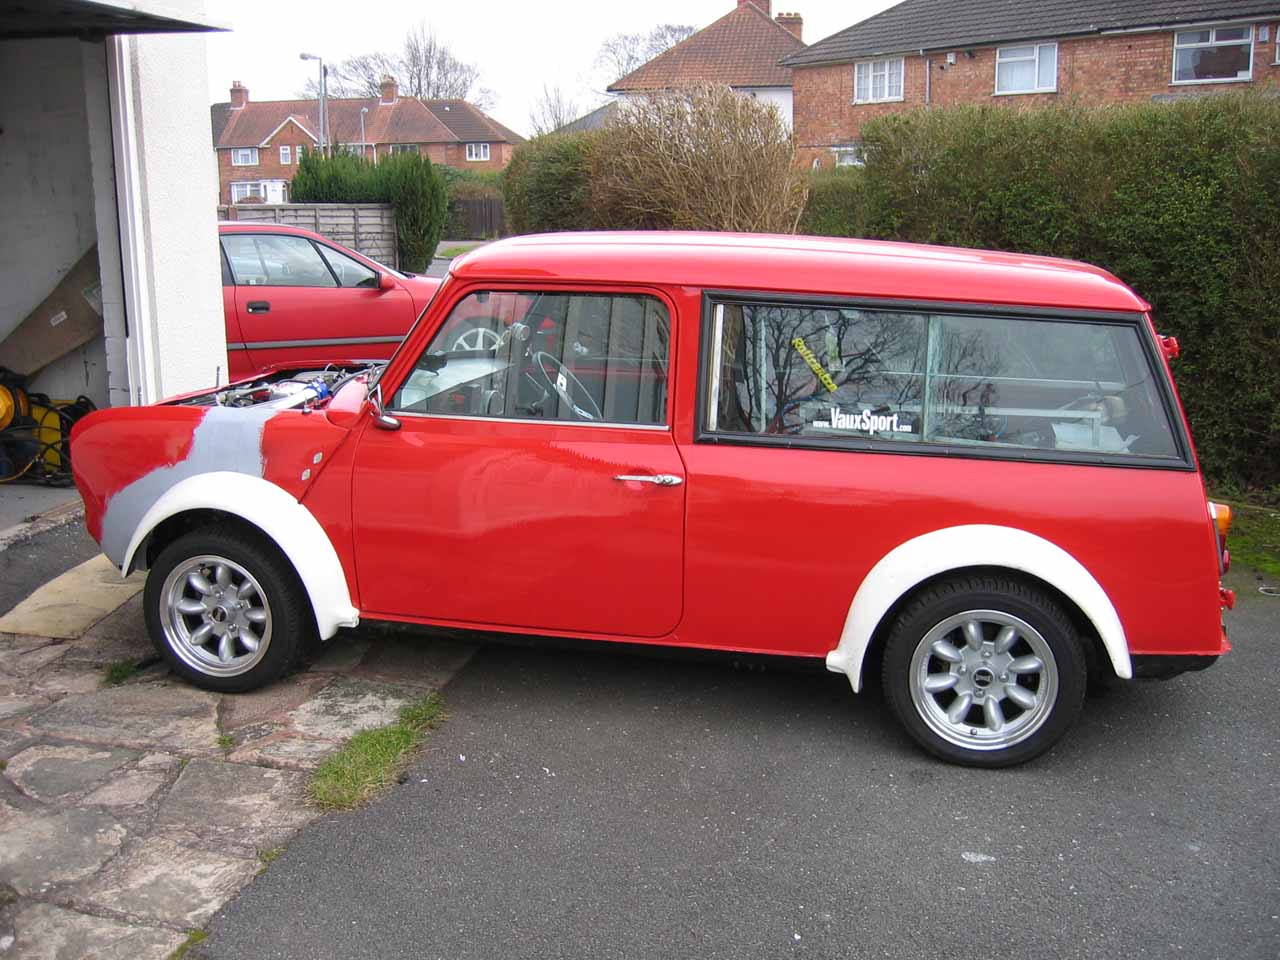
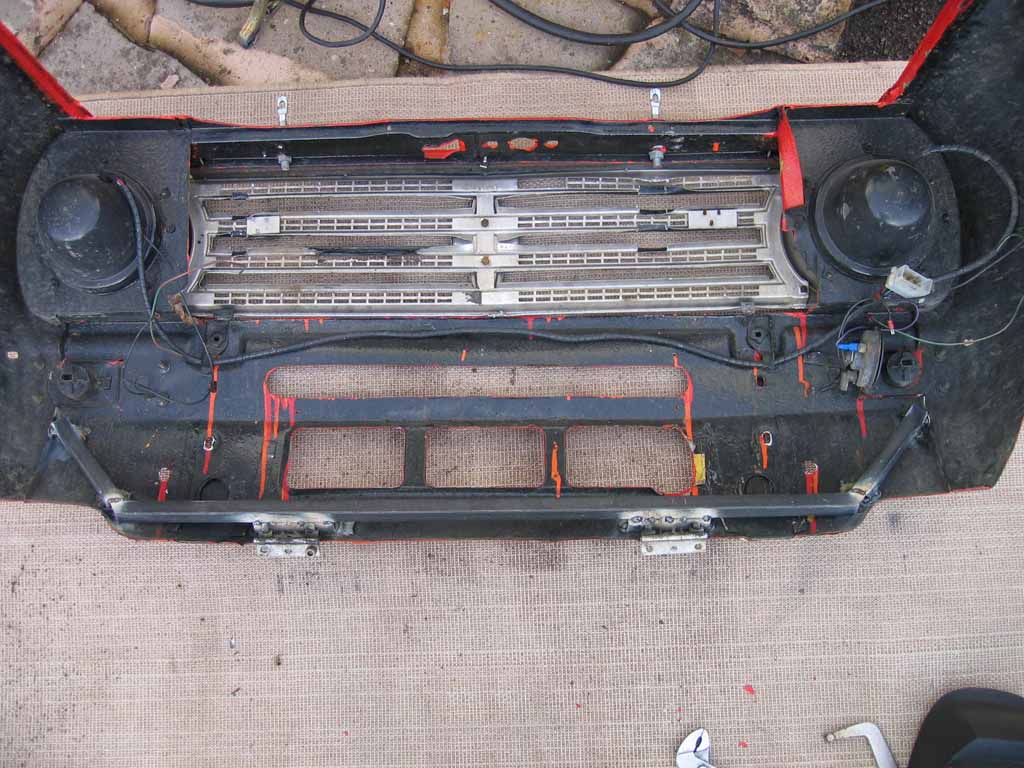
Extending the Front to make space The TD05 was a bit larger than expected which meant a straight fit into the front engine bay wasn't going to happen without a complete redesign of the cooling system (the TD05\manifold needs approx 240-250mm from the block face to the furthest forward component, the wastegate actuator and I currently had 200mm), rather than scrap the current cooling I decided that it would be better to do what several other 16v mini conversions have done and extend the front end a little (approx +90mm). There's still a lot of finishing off to be completed on the wings\bonnet but for ongoing installation work it will do for now.
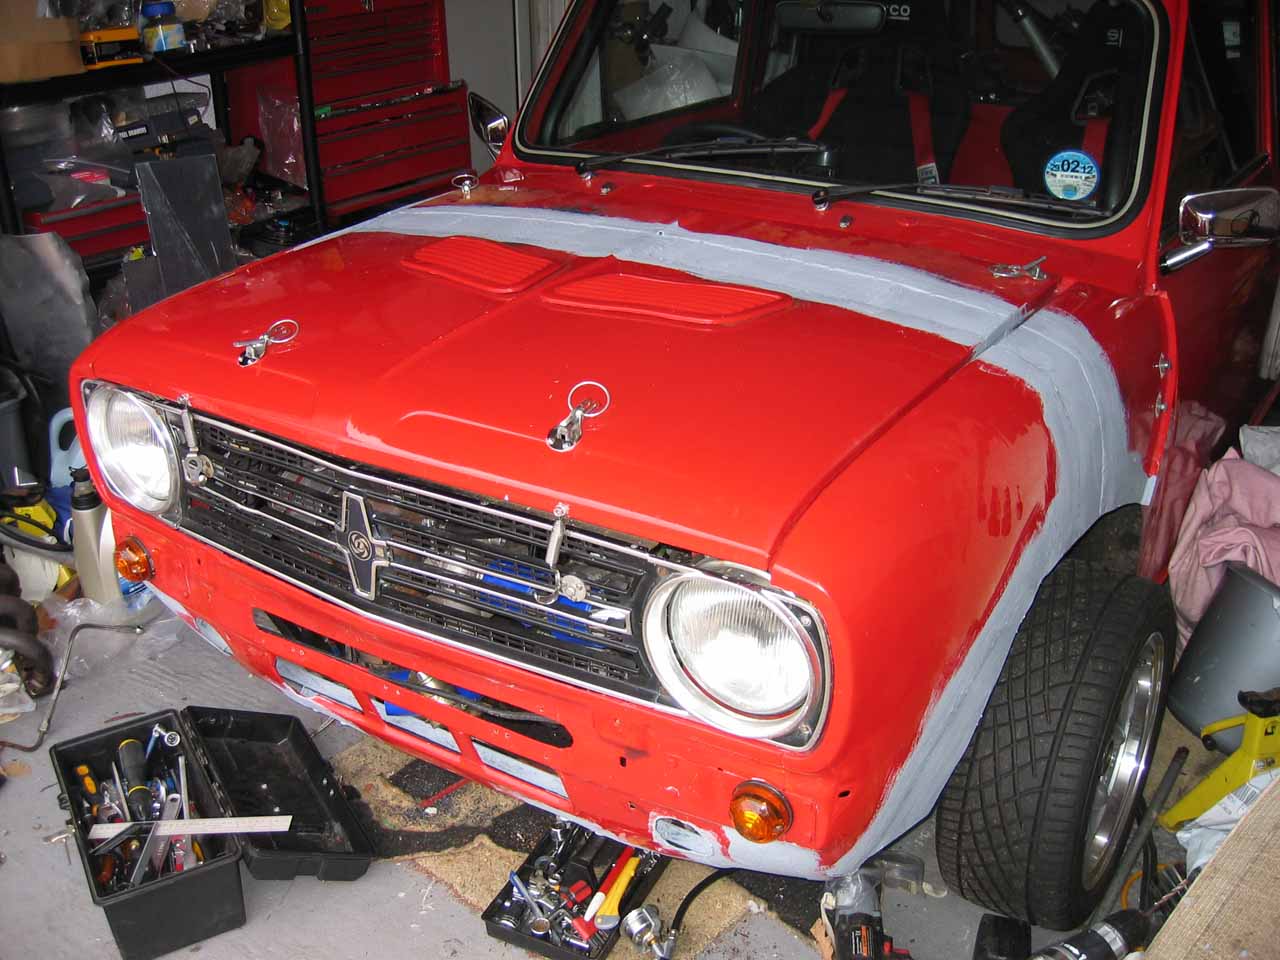
The front end popped back on temporarily with a quick coat of oil based primer on all the bare metal bits to stop it rusting (I will eventually get round to filling\painting properly to make it look nice..... honest lol).
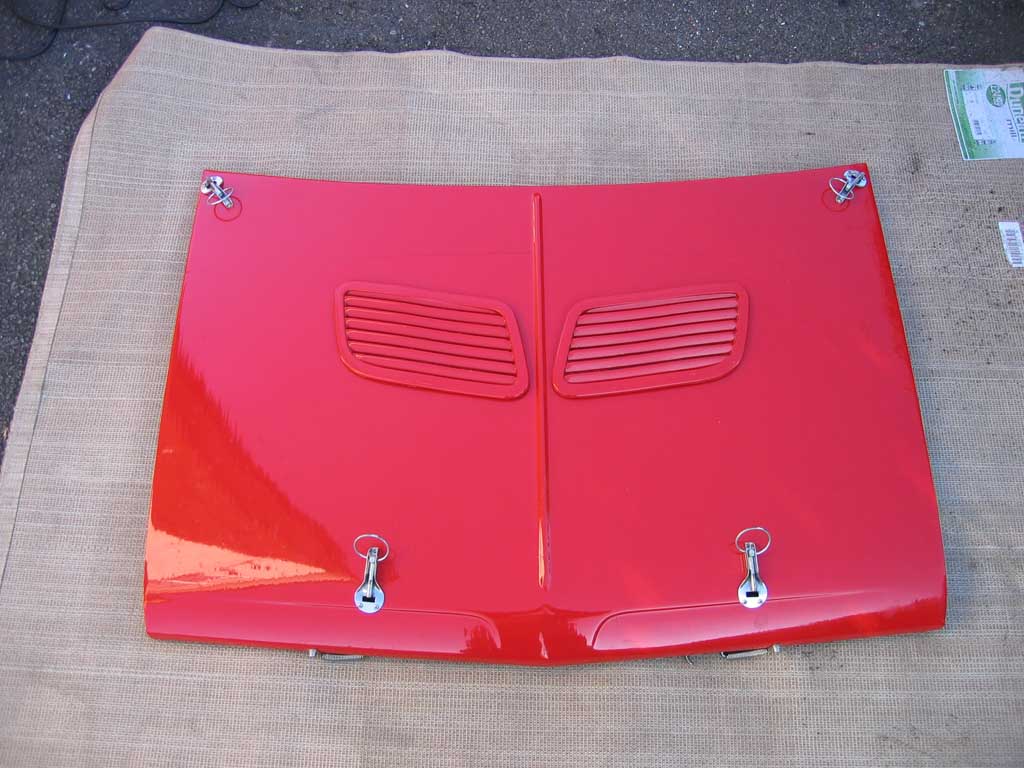
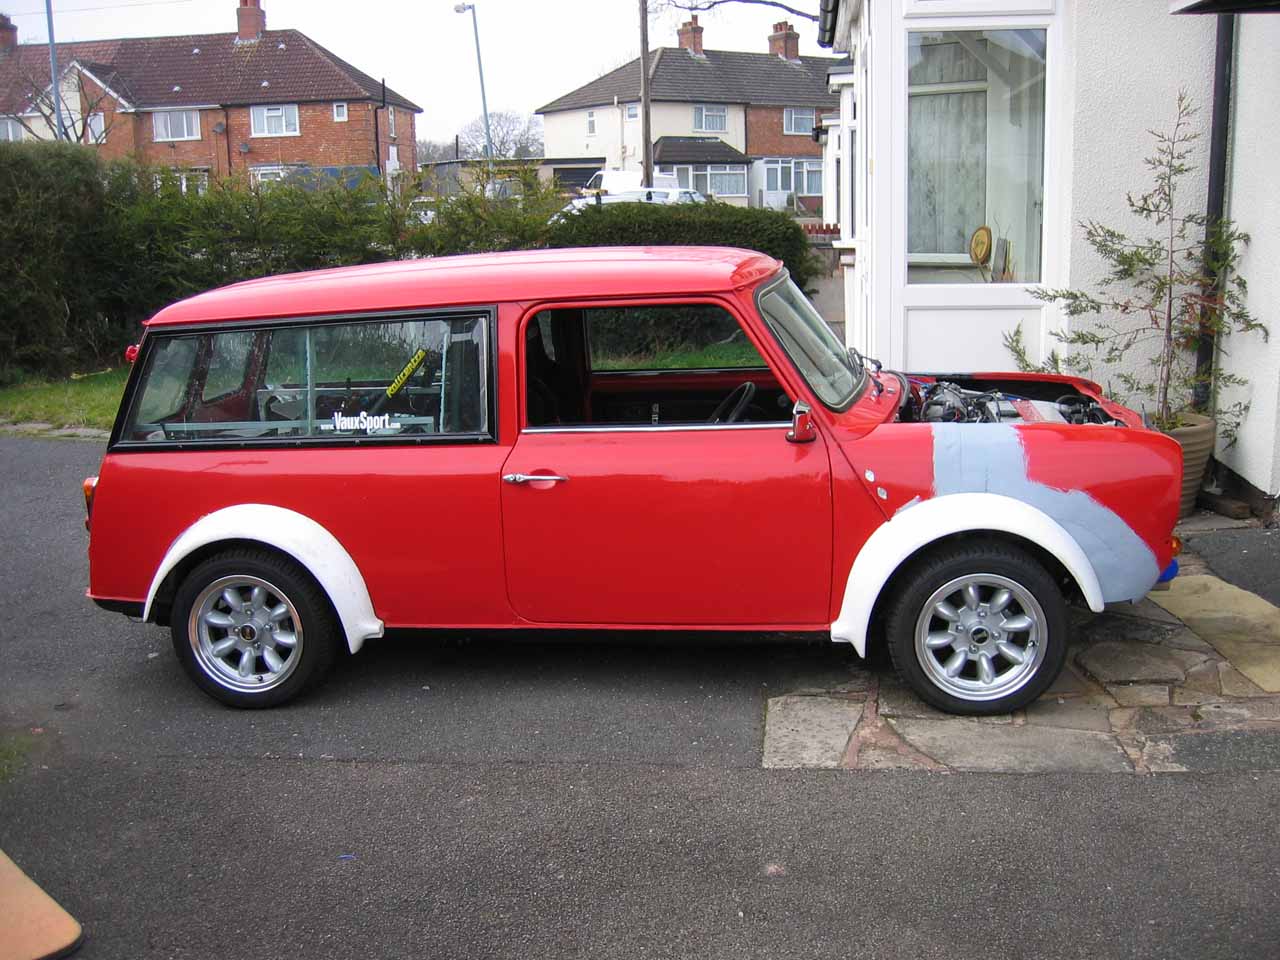
Now have the arches back on etc so can be mobile again on the road and also get a better view of how it looks extended, I actually don't think it looks as bad as I expected when extended about 90mm.
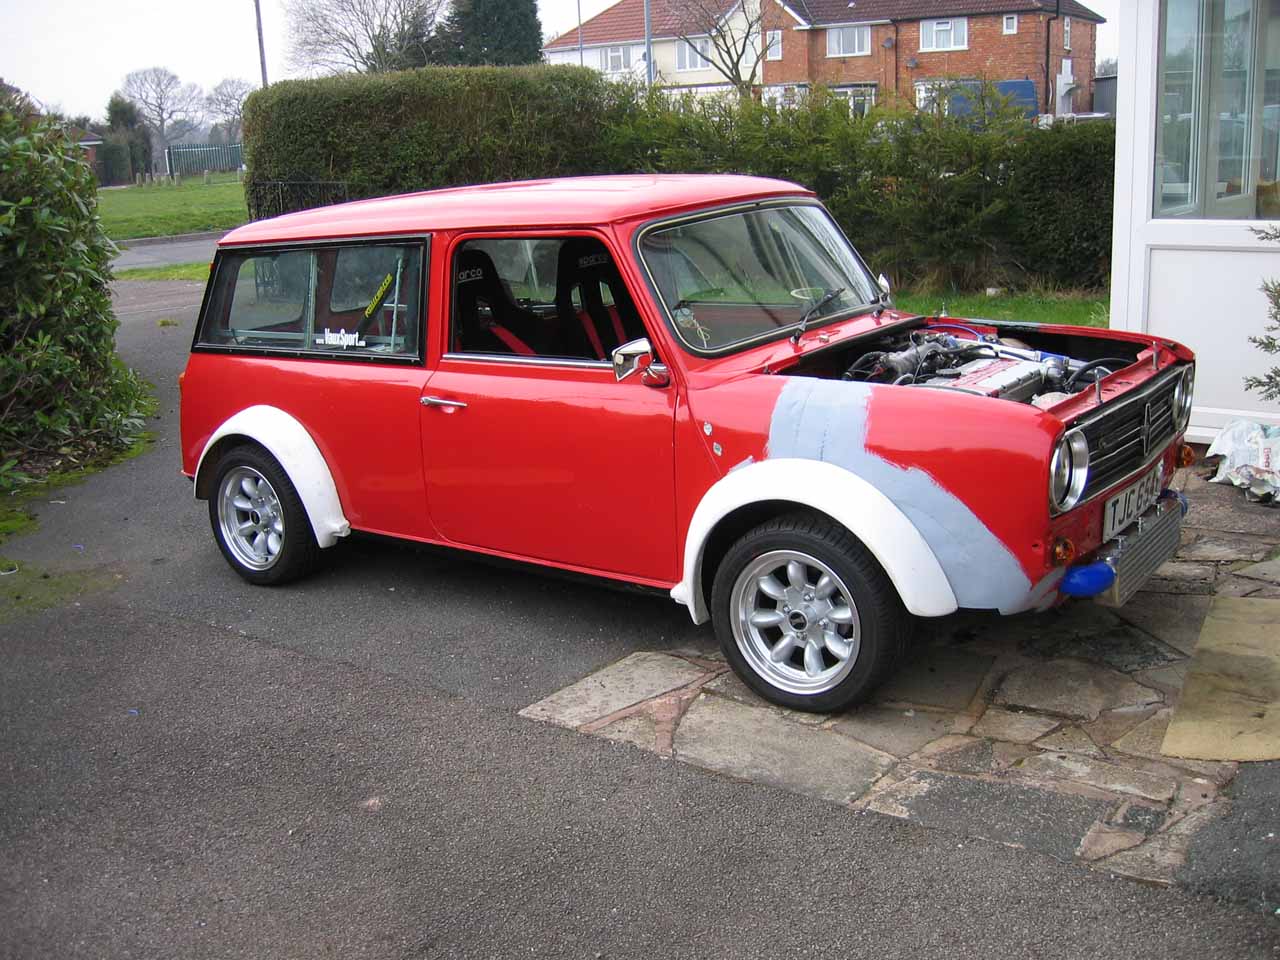
I couldn't cope with the random primer and white bits any longer (especially once the side intakes were fitted) so quickly slapped on a top coat of red, it looks much better in the pics than it does in reality but it's still much much better than the mix of colours it had earlier.
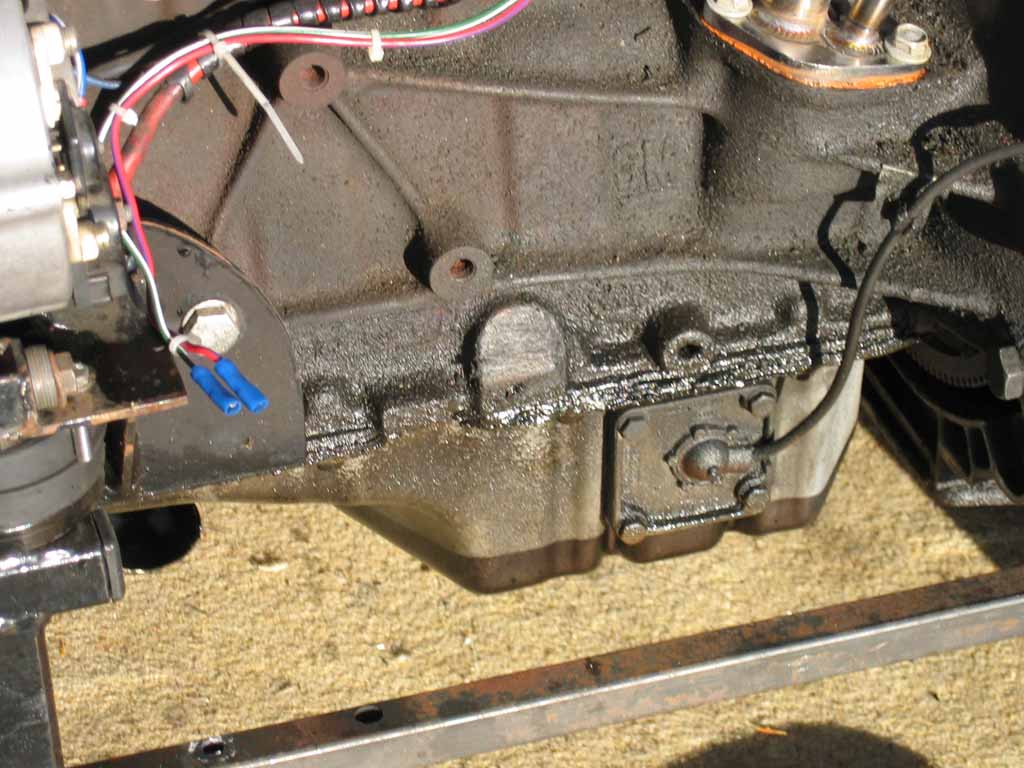
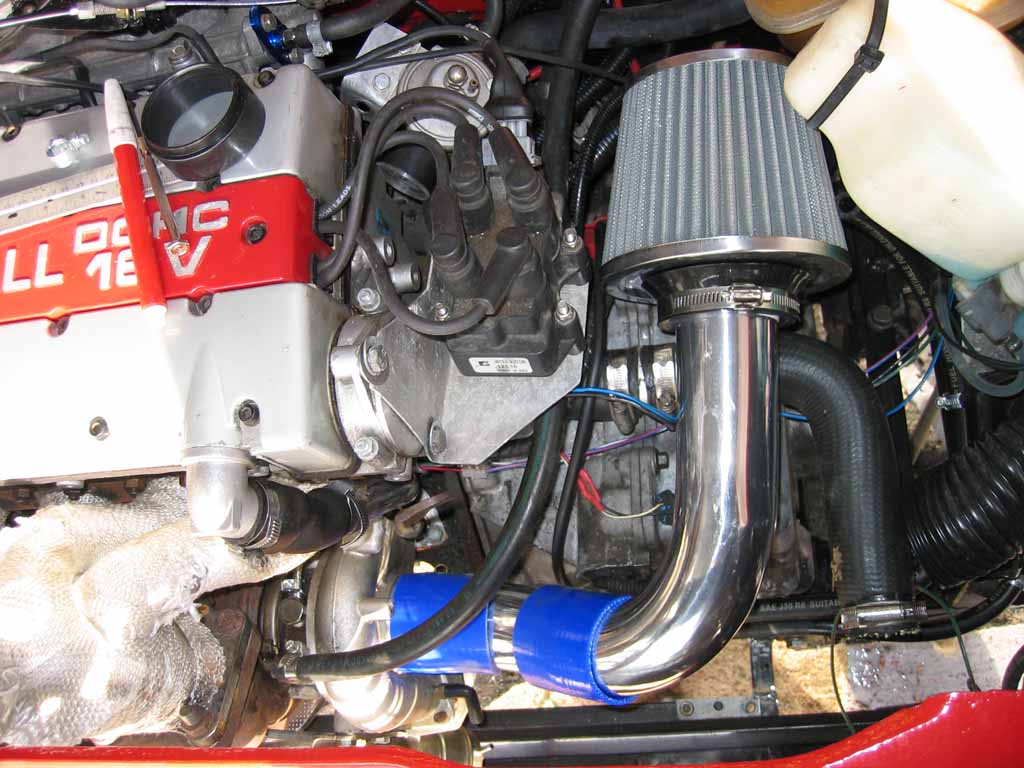
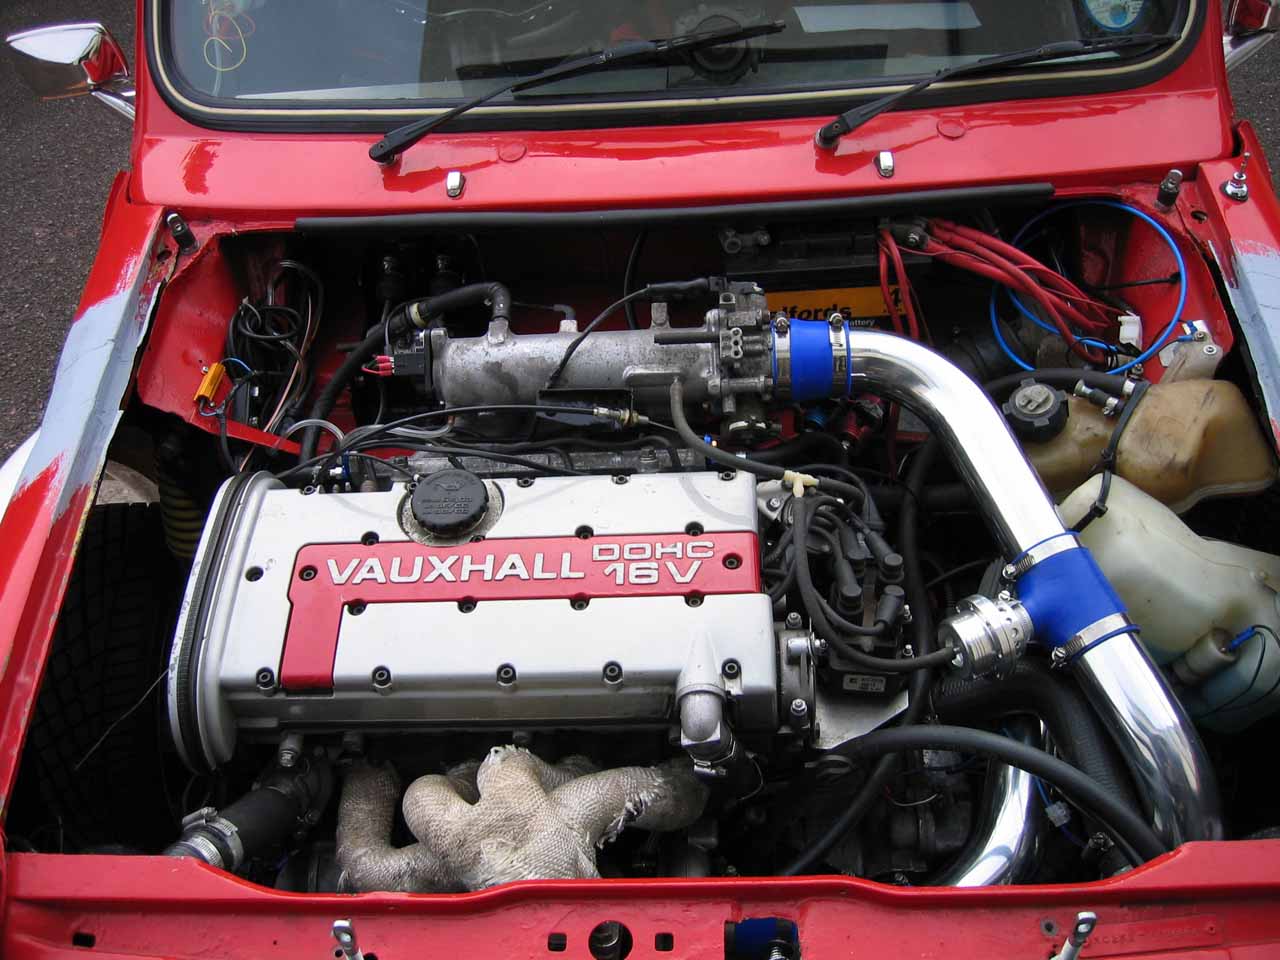
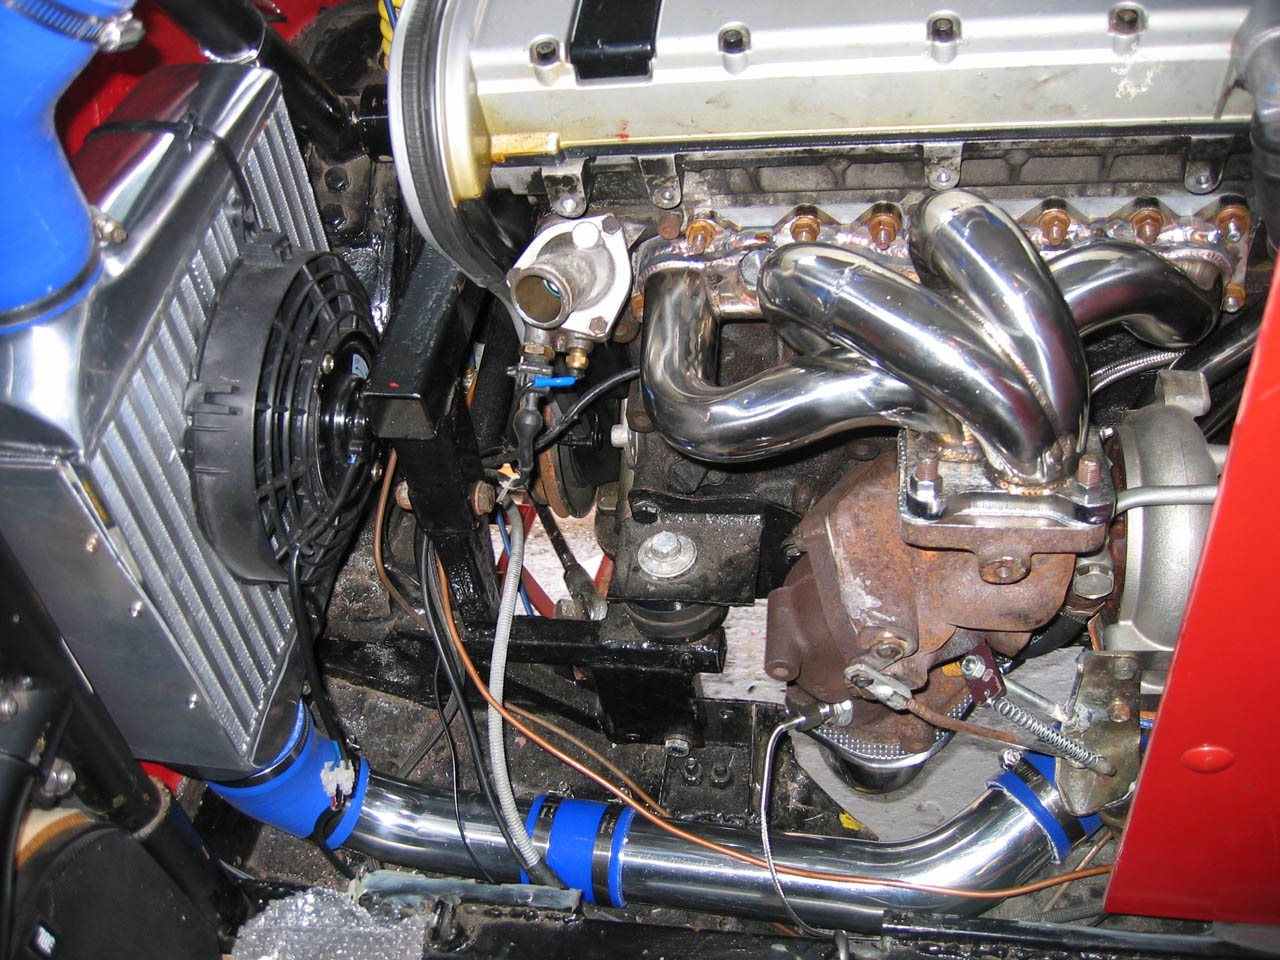
Fitting the Evo TD05 Front Turbo The TD05 sits very close to the dipstick\head breather pipe and the stock cast item is just in the way too much so these slimline stainless items can be purchased off ebay to fix that issue.
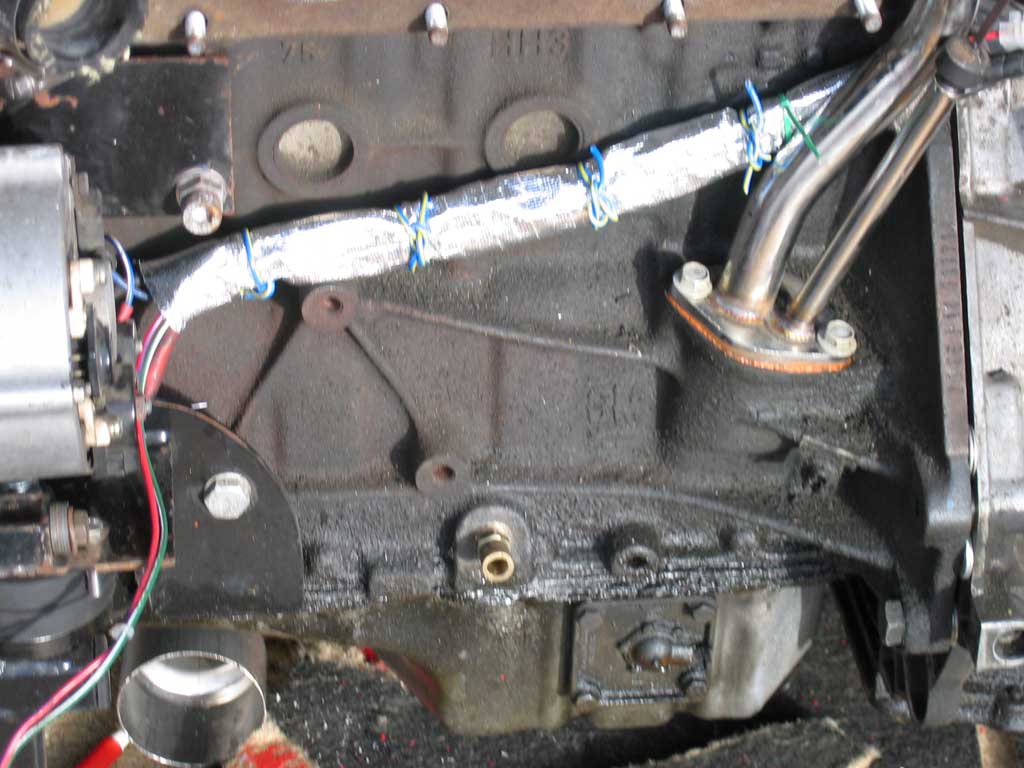
Being an XE rather than a LET a Turbo Oil Drain hole needs to be added, there is already a blanking area where you can drill a hole and bond in a drain tube here. As you can see in the second picture the oil drain hole has been drilled and a brass fitting hammered in there. I also heat wrapped the wiring at the back as although it's about 10cm away from touching the hot side of the turbo it had already begun to melt simply from the hot air blasted over it when driving and that was with a stock non turbo exhaust manifold so likely even hotter with a turbo.
TD05 in place, with the new extended front it shouldn't be a problem with space any longer and should be able to get a much better radiator fan in there now too.
I purchased an Evo 6 downpipe with the intention of simply chopping it up to make a template which could then be made at a custom exhaust company but it wasn't too much cutting\welding to get it to fit anyway without having one made :o) One problem was that the front crossmember was really in the way so I made up a new one that clears the downpipe.
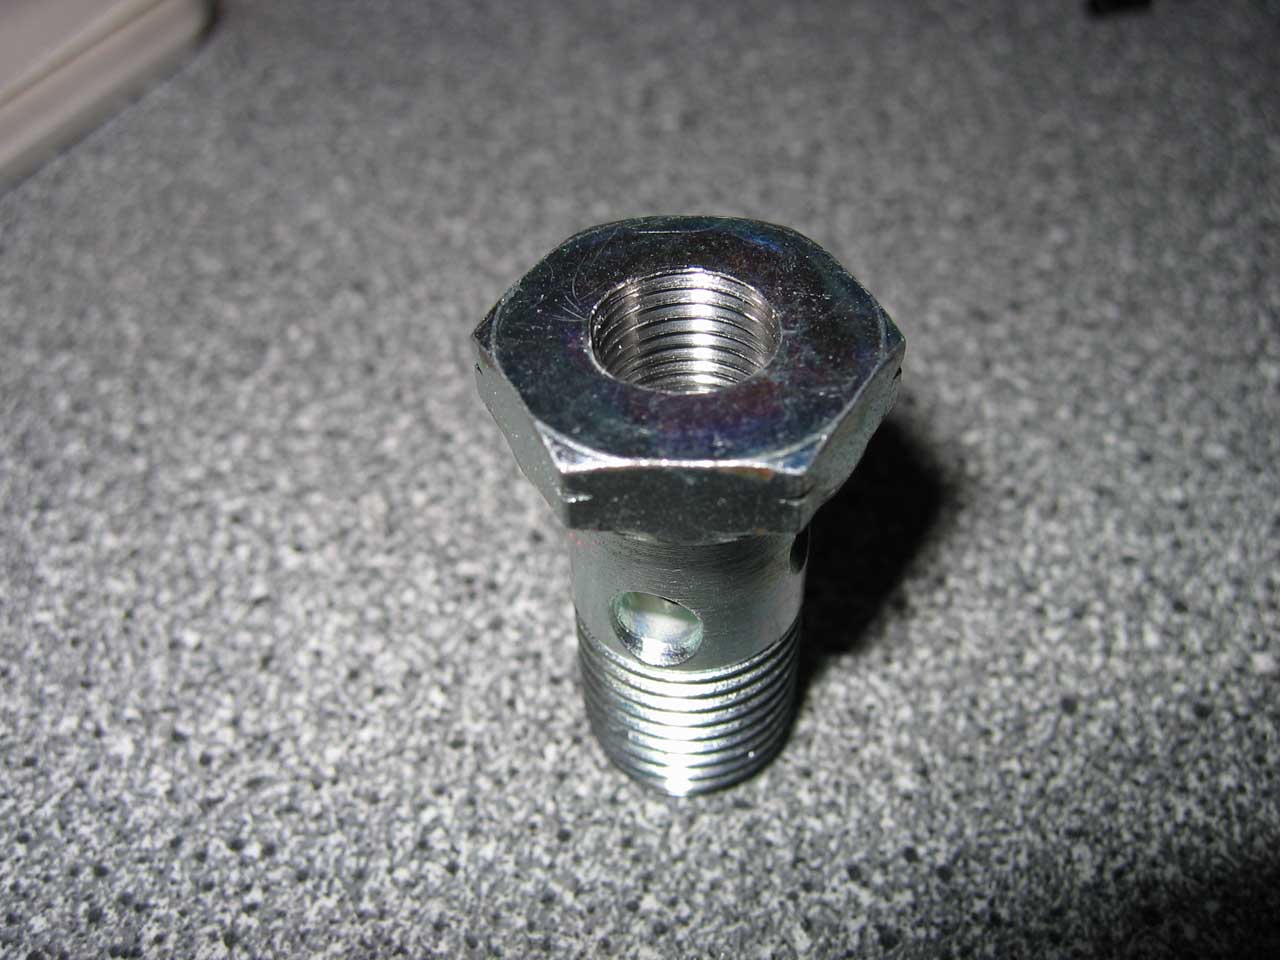
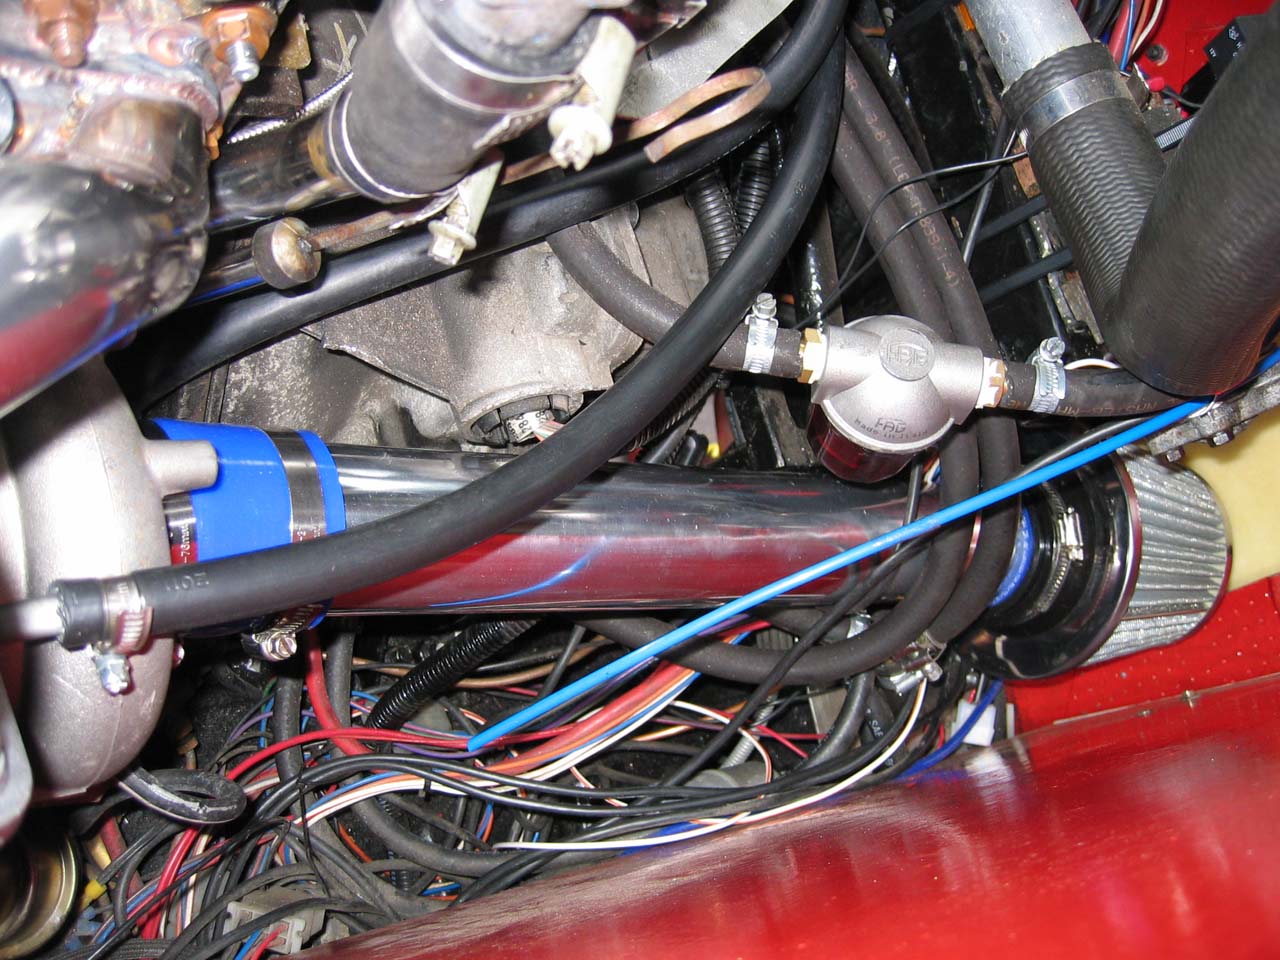
I couldn't get the stock LET oil feed piping to fit due to the alternator and engine mount positions so a new pipe was made up (a bit crude so will prob replace with a custom made one later) which routes around the other side of the engine, one word of note is that the main power feed to the starter is also passed by so be sure and disconnect the battery first (or else you melt\weld the pipe like I did on the first one lol) and also check the braided pipe won't bounce around and short out causing a leak and possible fire. The oil feed supply on the back of the engine used up the location where the oil pressure sensor went, due to engine mounts etc there was no other spare place to take the pressure from so I drilled out the banjo bolt to 8.6mm and threaded it with a 1/8NPT thread so the pressure sensor can be installed again in the same location. Since the banjo feed diameter is much larger than the pipe itself the pressure reading should still be accurate.
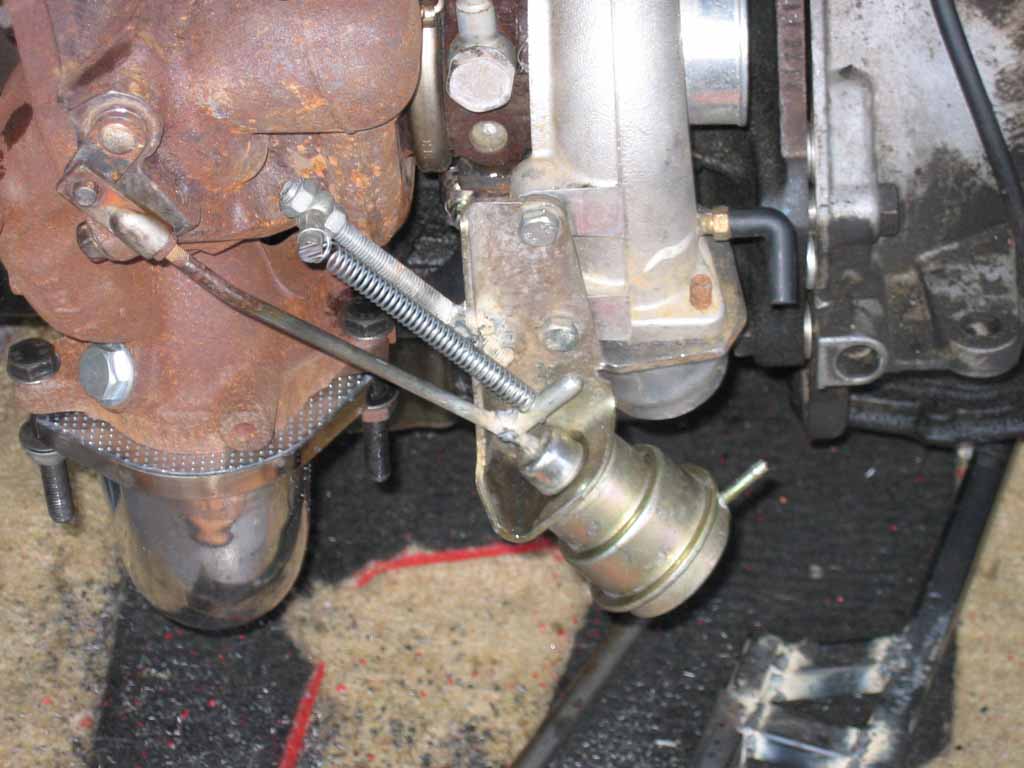
Due to the compression being so high currently (prob about 9-5:1) running high boost levels isn't a good idea so wanted to limit it to about 0.5bar max. The stock actuator will create about 0.8bar so in order to lower this a counter spring has been fitted to pull against the actuator and lower the pressure when the wastegate is opened. I have now tested this on the road and the boost holds stable at a near perfect 0.5 bar without any changes to the spring or tension setting.
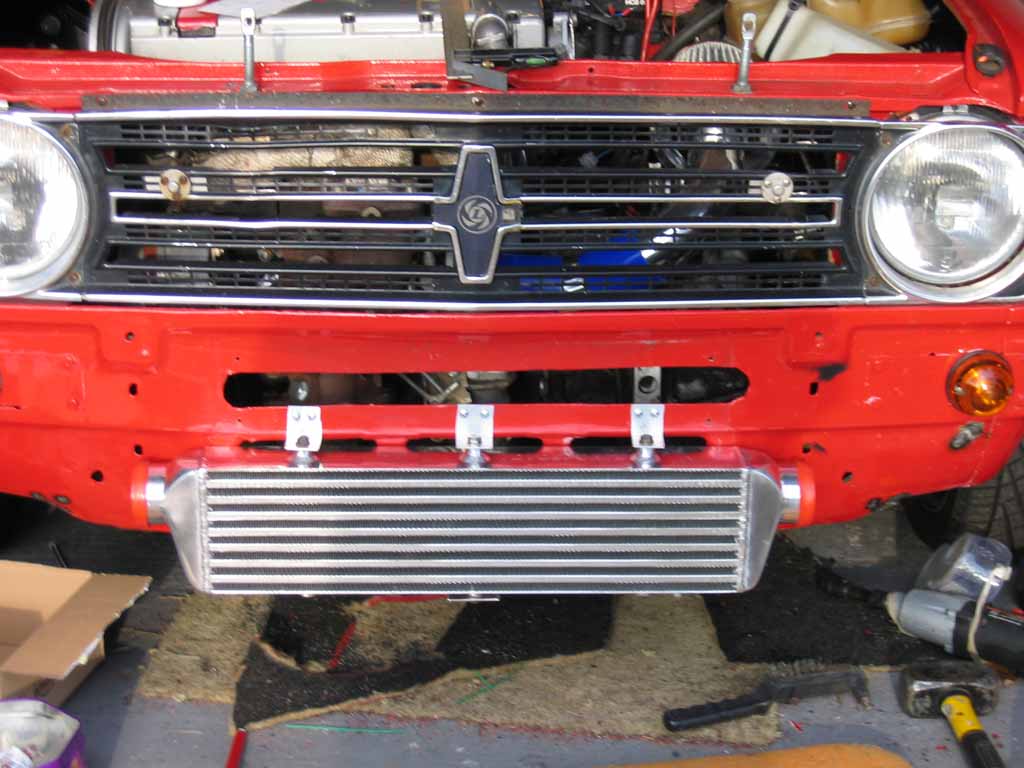
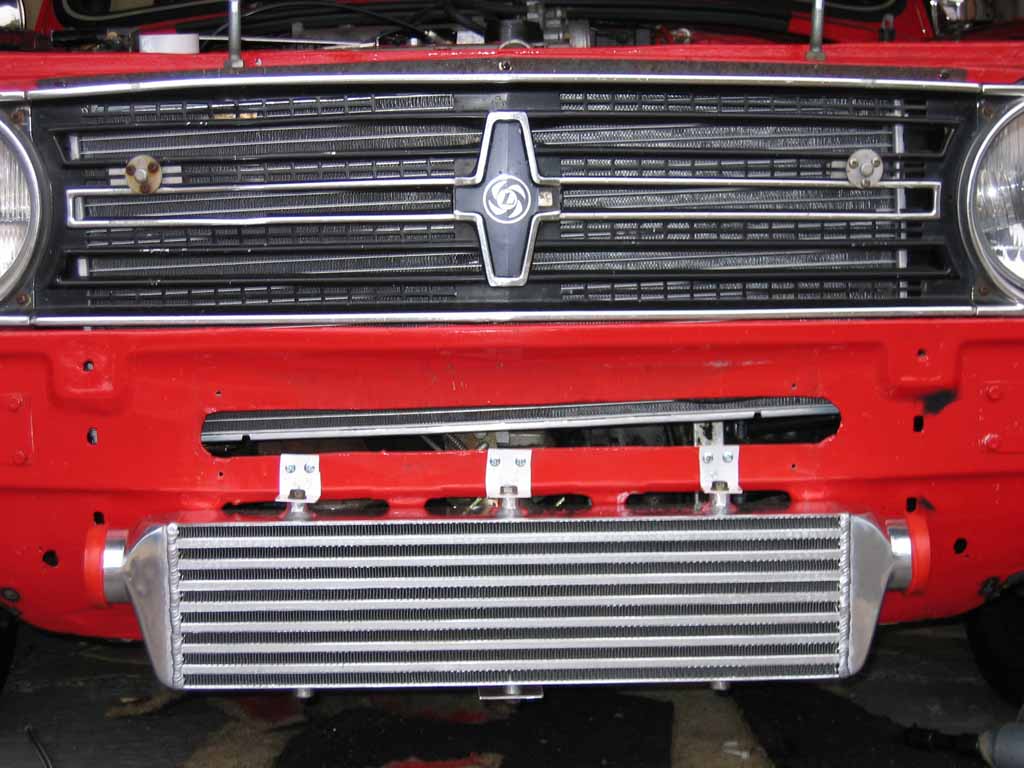
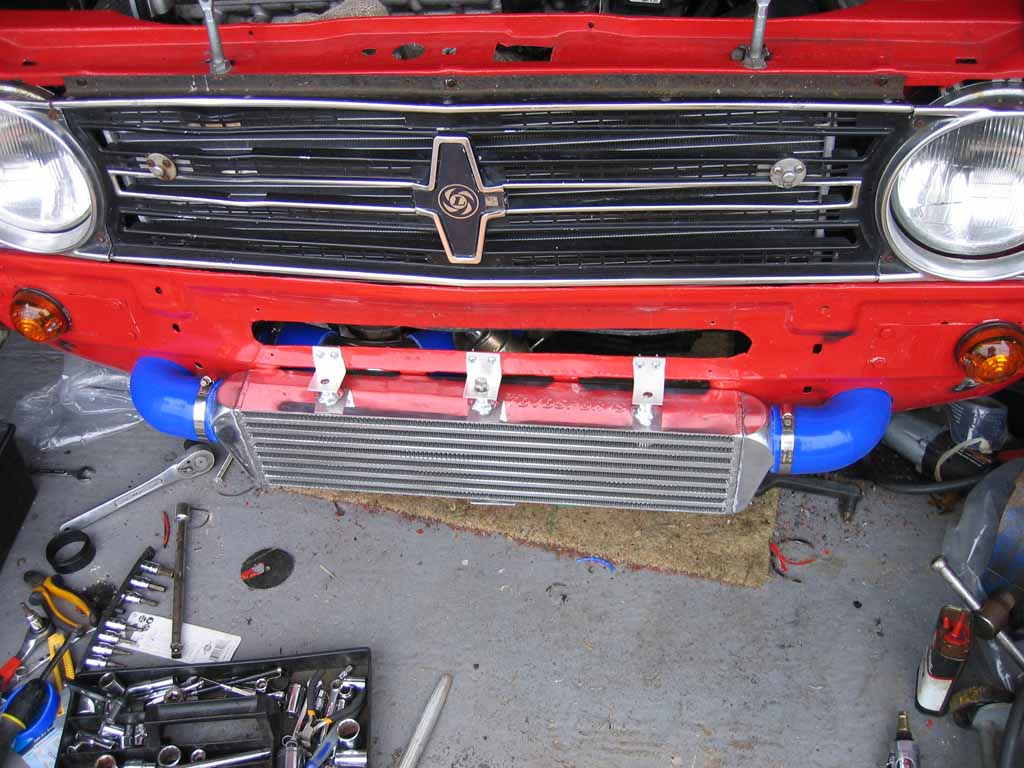
There wasn't going to be space for the intercooler to fit inside the bodywork so it's been fitted to the front lower panel externally. The intercooler pipes will be difficult to route from the turbo outlet to the intercooler but not impossible.
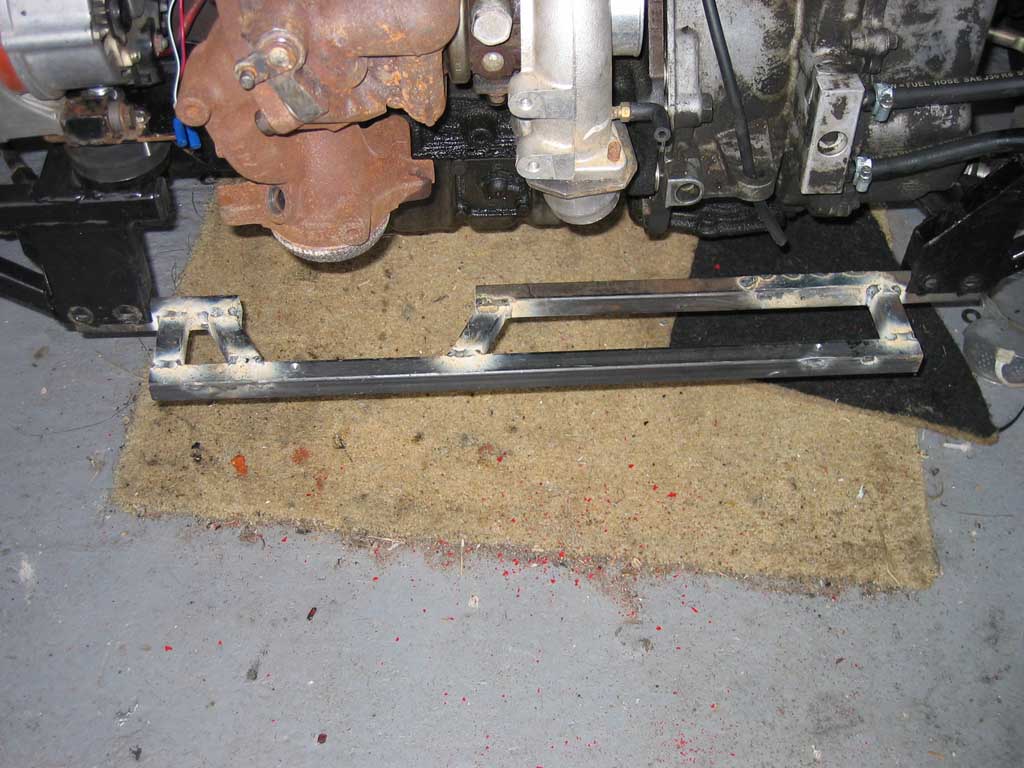
After adding the weight of the intercooler the front was getting much too flimsy at the lower mount points so some steel bars were added to improve the strength a fair amount.
The front intake pipes have been made up and fitted ok making good use of the spare space.
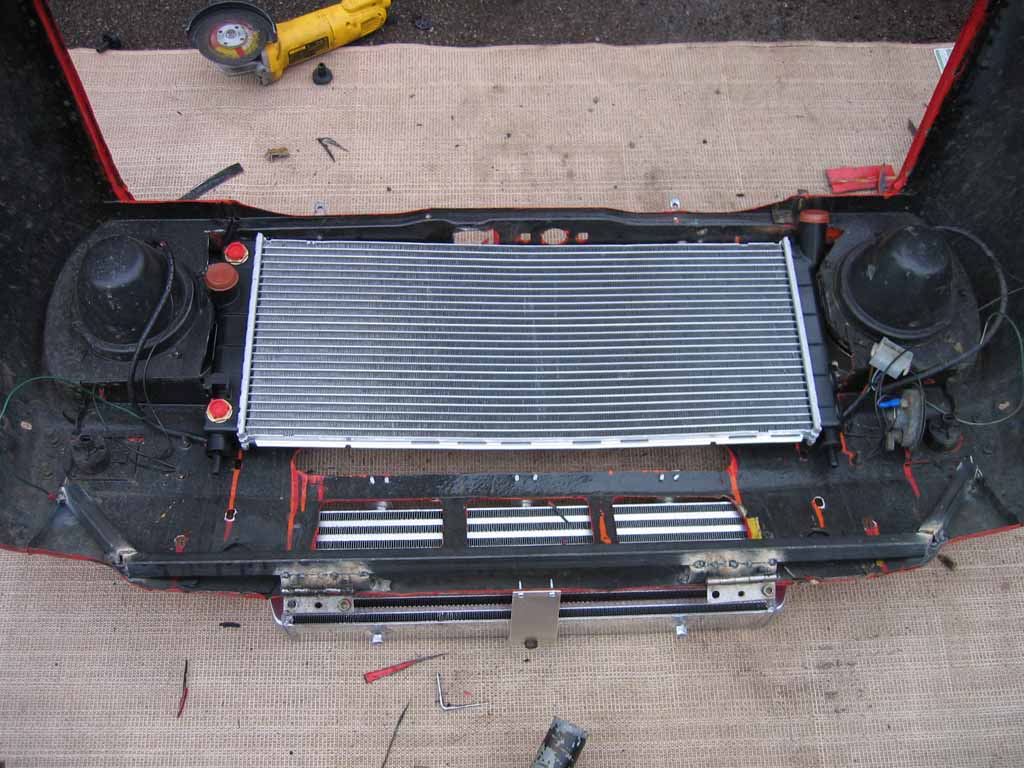
As you can see in the previous turbo pictures the turbo actuator sits in a really awkward place meaning that there wasn't as much space as i'd originally hoped for fitting the radiator from extending the front. Above the actuator there was plenty of room though so I hunted down a different radiator to be as big as possible but not as deep as the calibra one fitted currently. Eventually I found that the largest one I could get in there was a Tigra A (94-01) 1.6 16V air-con model (I have the automatic one here so I can cool the transmission too but the non auto one is the same dimensions). You can see it's pretty tight requiring a fair amount of chopping and is actually touching on the edges of both headlights but it is in there, I also bent this one slightly in the middle to make best use of the space available. Although not 100% the same cooling area as the calibra one it's only marginally smaller but due to the positioning it will get much better air flow and also thanks to the extra space I can fit a bigger radiator fan than before for sitting in traffic.
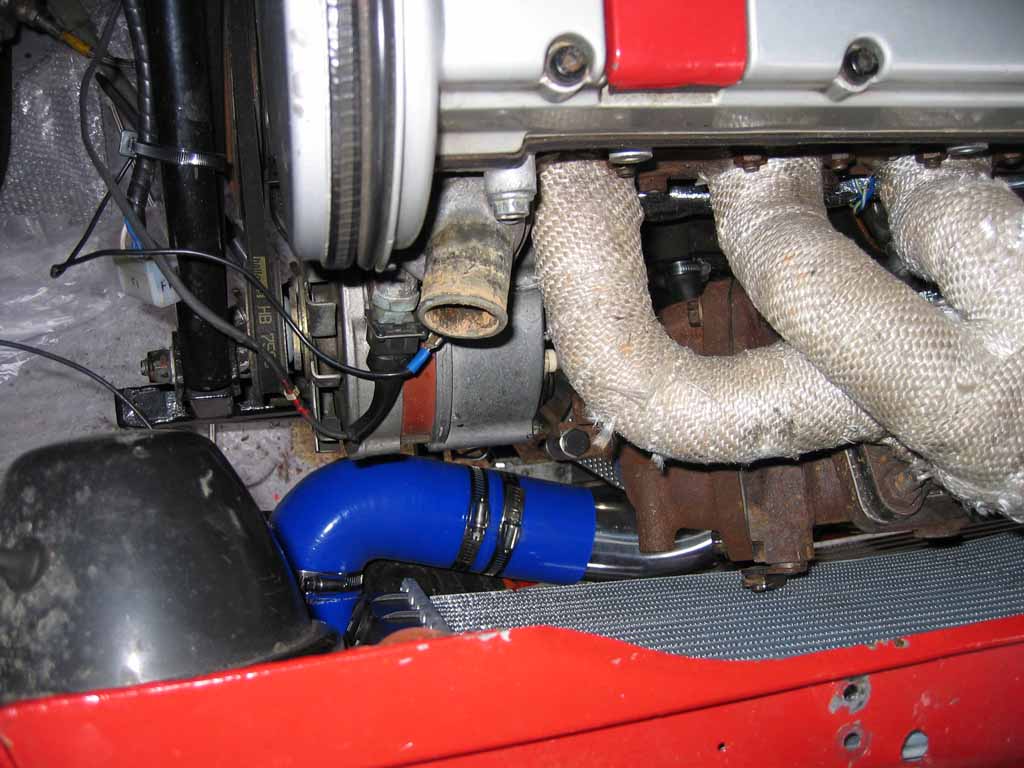
The intercooler piping was quite challenging as there was such a small space to get between the front panel and the exhaust downpipe but it's all in there now.
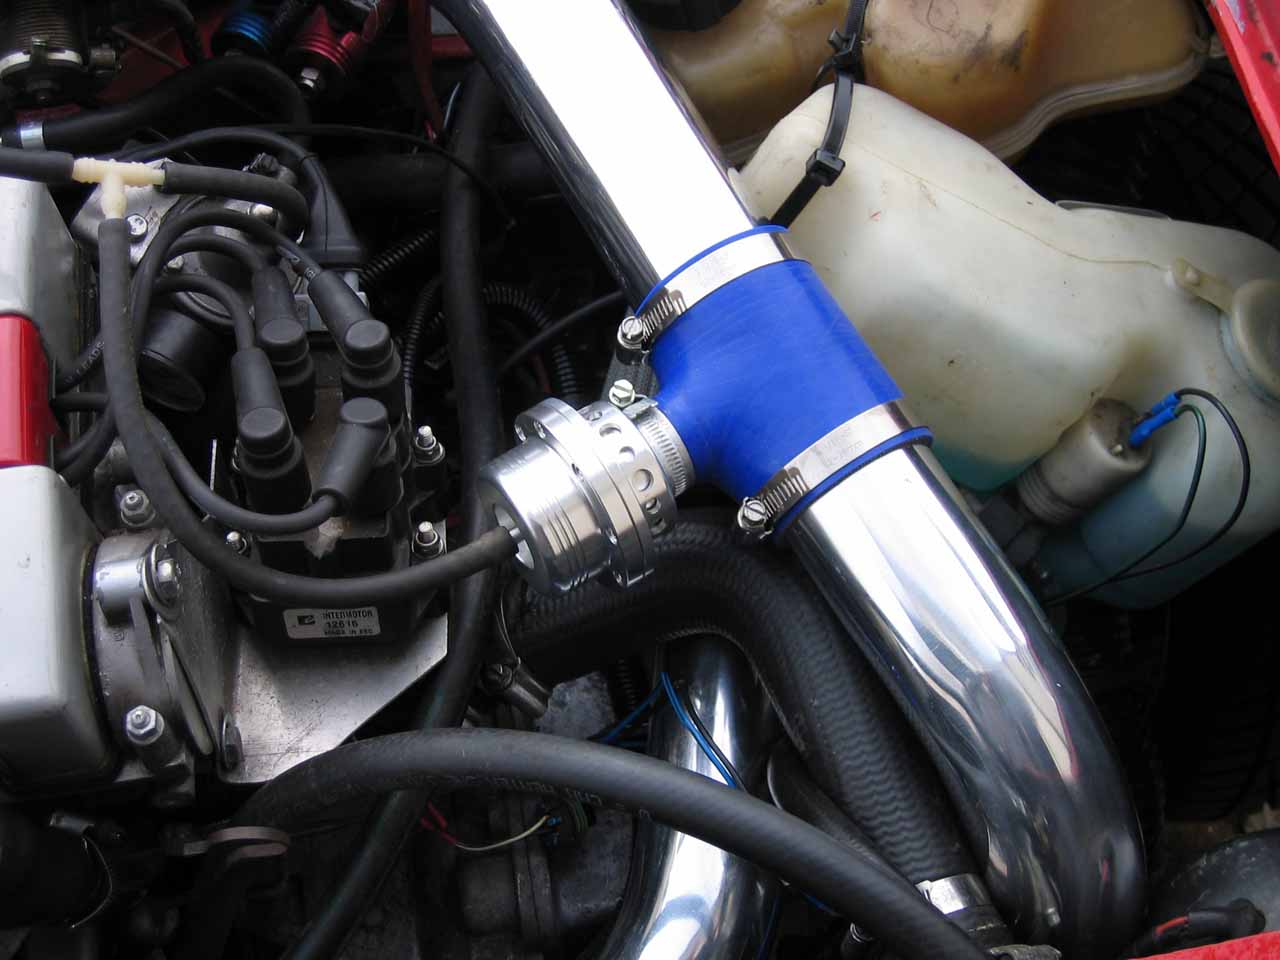
Here it is now all assembled and running :o) BOV has been added to lower the back pressure on the turbo when lifiting off although this probably could have been left out when running only about 6psi boost, i've missed the noise :o)
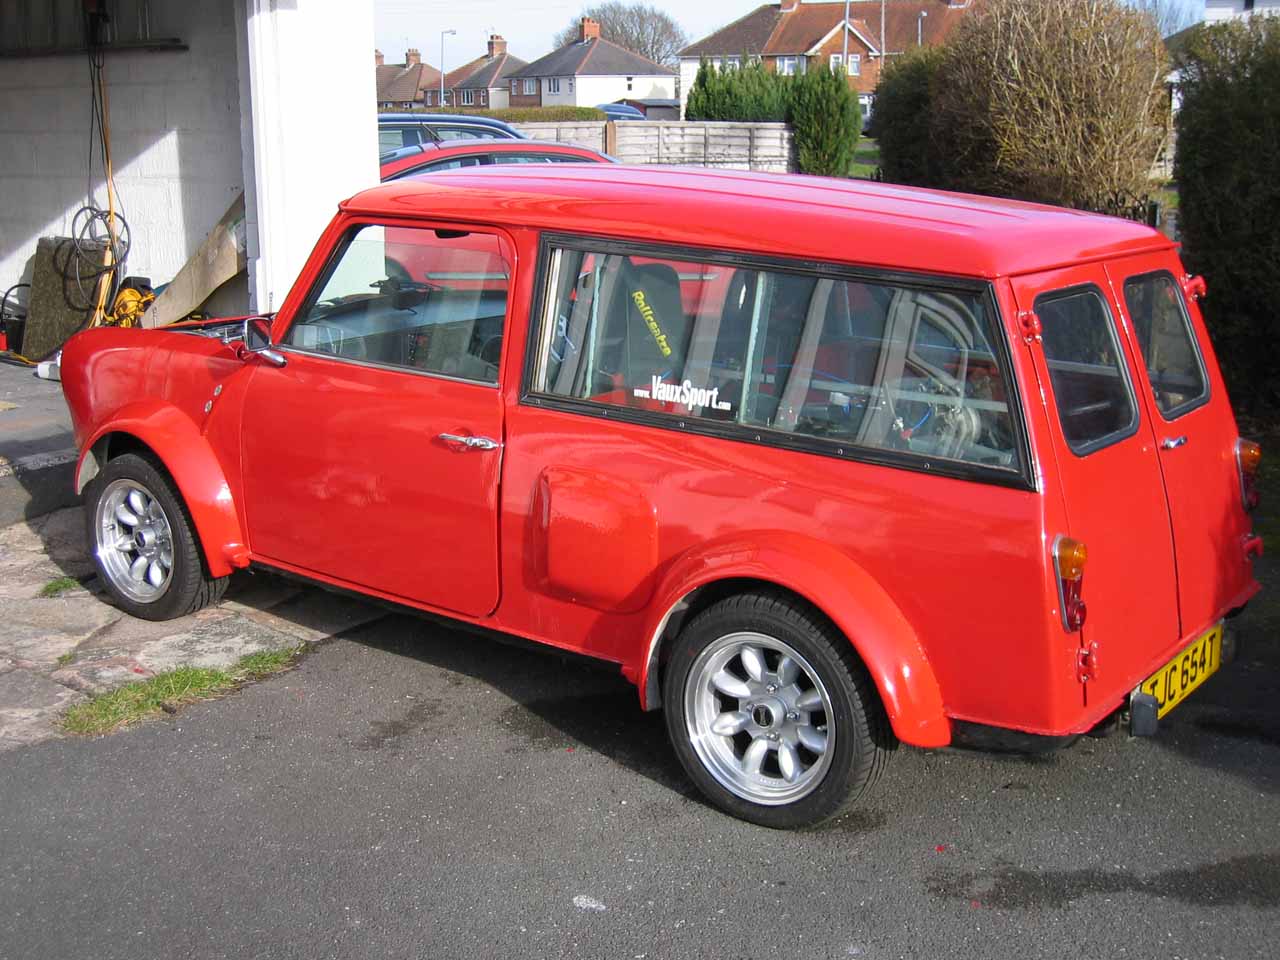
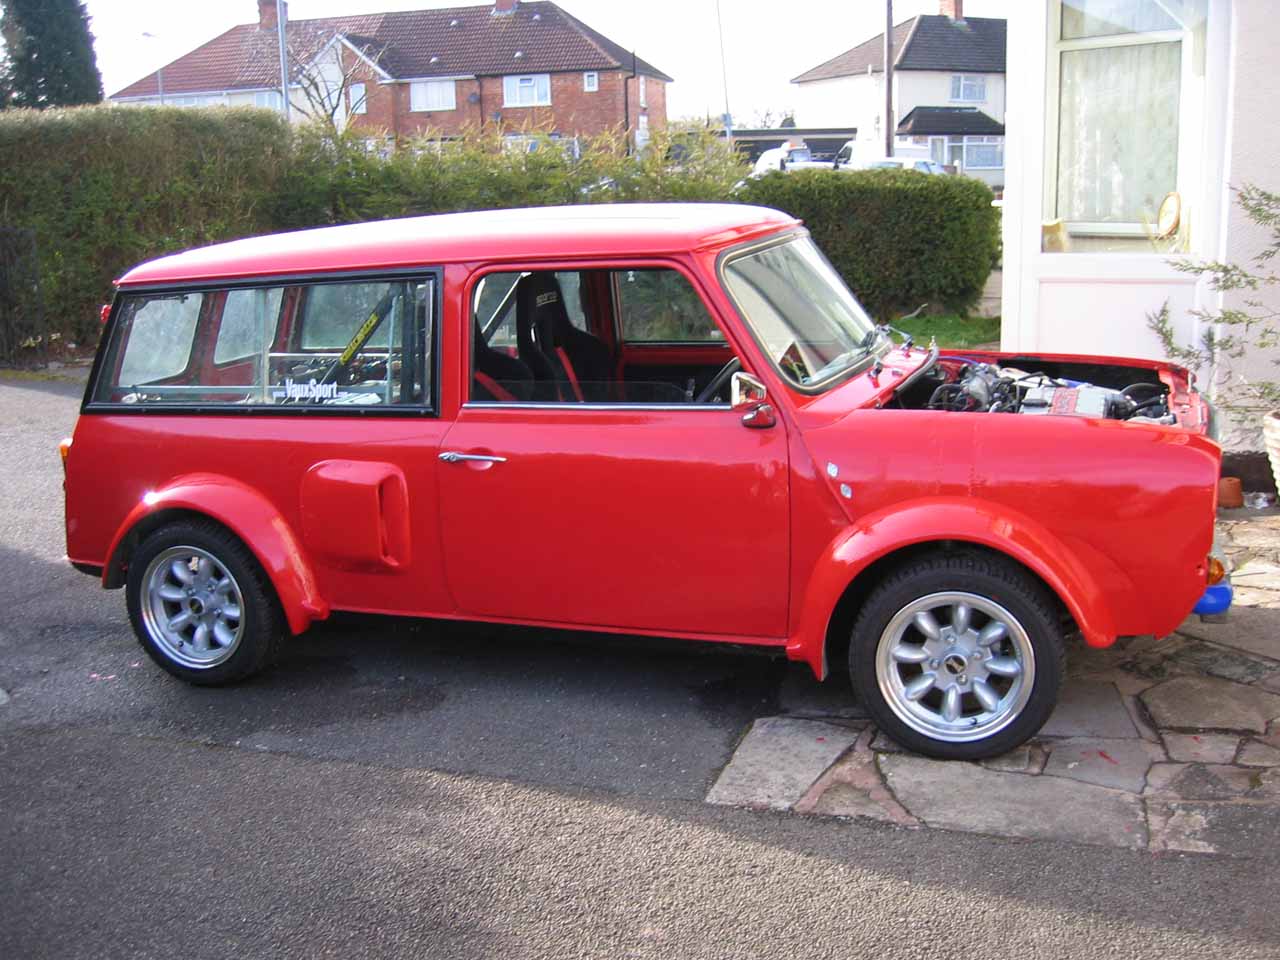
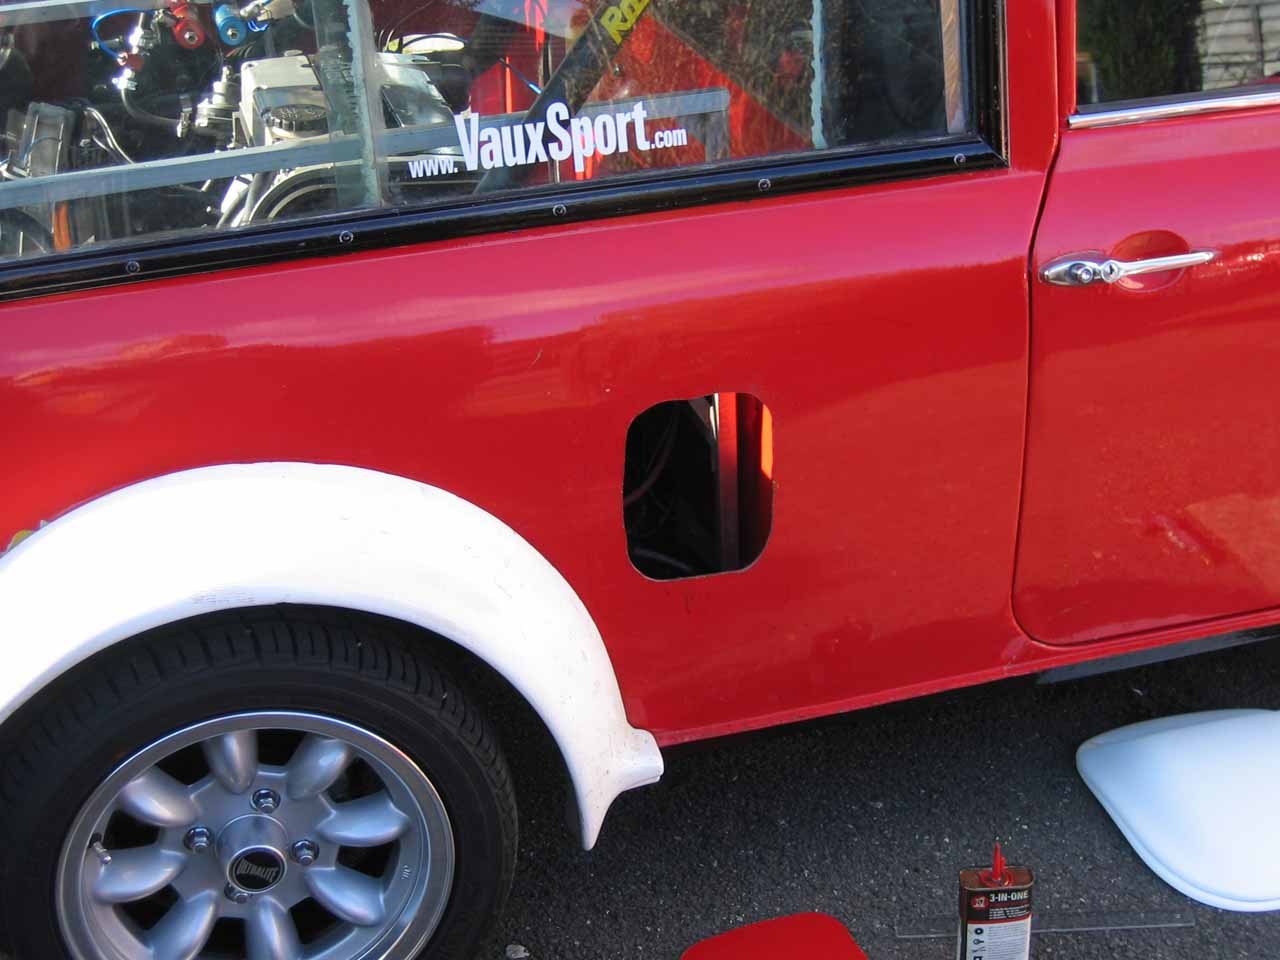
Fitting the Evo TD05 Rear Turbo As the general fitting to the rear is similar, the dipstick, oil feed, actuator mods, oil pressure sensor will be the same as for the front and won't be detailed again in the rear section. Obviously there will be different intercooler pipework, cooling pipework etc to cover off here. The biggest problem that has always plagued the rear was the cooling as there simply wasn't enough air getting in the back for long distance cruising or track sessions (it was sufficient for drag racing though), with a turbo this problem will be increased. In order to get more cold air into the rear compartment I have added some side air intakes. One side will be for Intercooler air and the other for water\oil cooling, the intakes are quite small so may be replaced with some deeper items as required.
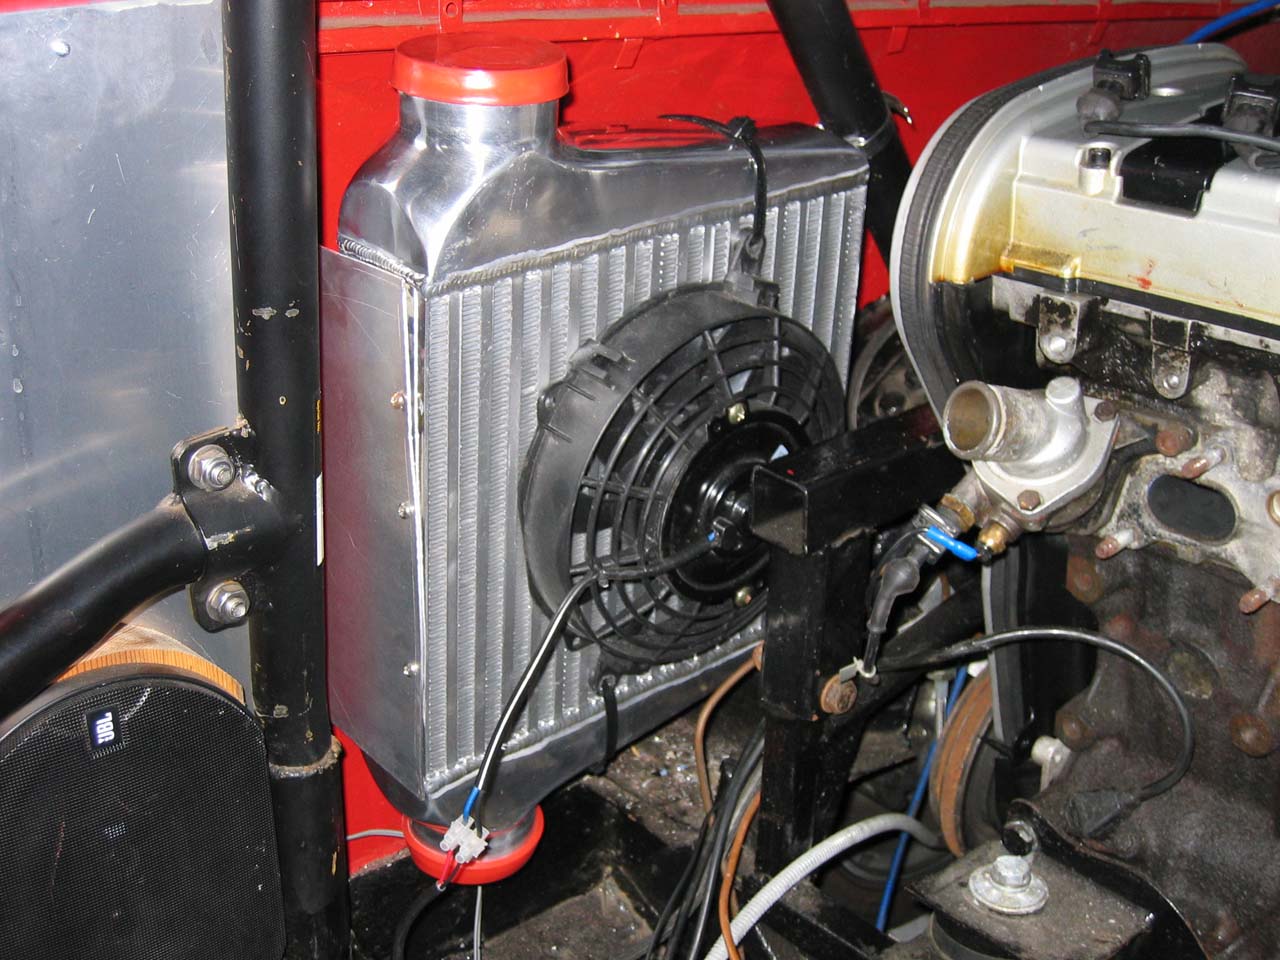
I think the street sleeper \ stealth image will be difficult to maintain now lol This was about the largest intercooler I could get into the rear, it should be ok for up to about 350hp so is plenty for this years requirements. I fitted a spare manually switched radiator fan to the cooler so it can get cold air when approaching the start line of the drag strip otherwise heat soak would likely be an issue effecting performance until sufficient air flow was attained through forward motion.
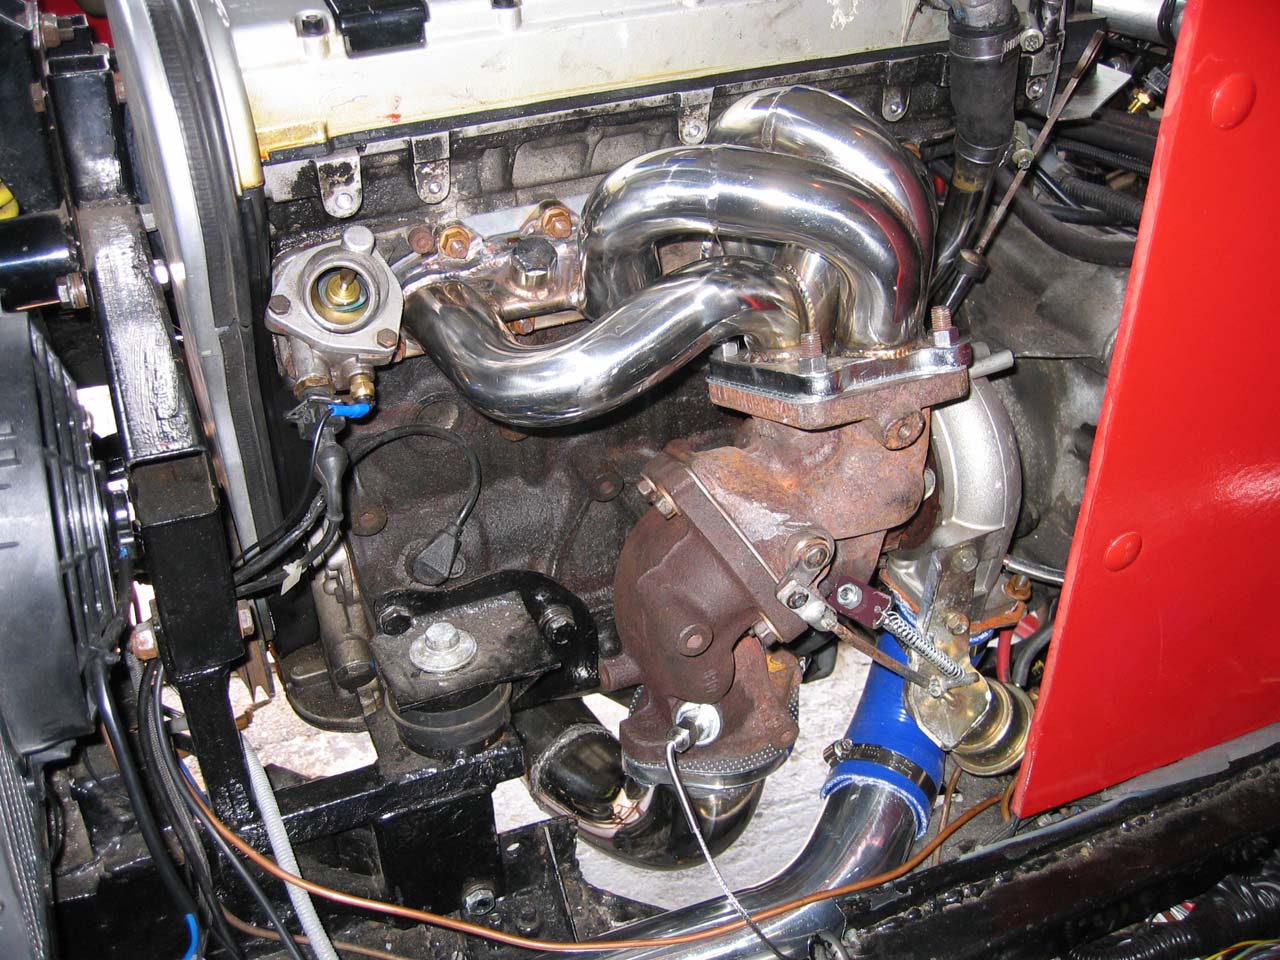
The rear turbo in place and all piped up with oil and water feeds.
Yet more anti stealth pipework for the top rear intercooler to inlet manifold, the turbo to intercooler piping and the air intake which is well placed for a cold air feed from the passenger side air scoop.
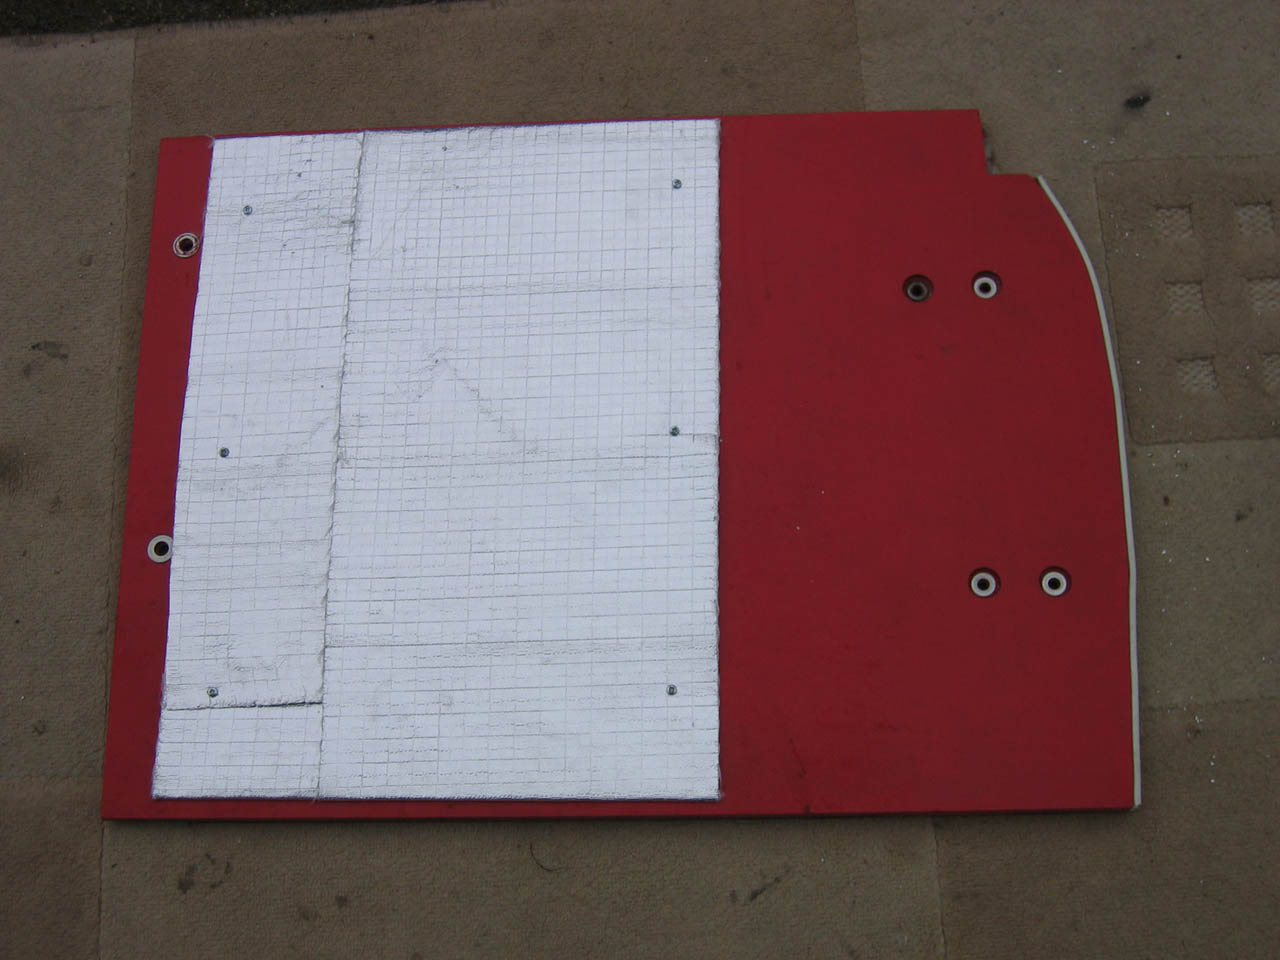
As the very hot turbo sits fairly close to the rear bulkhead I added some heat fabric and a sheet of aluminium for protection and also have now wrapped the exhaust manifold to lower the heat soak in the rear compartment.
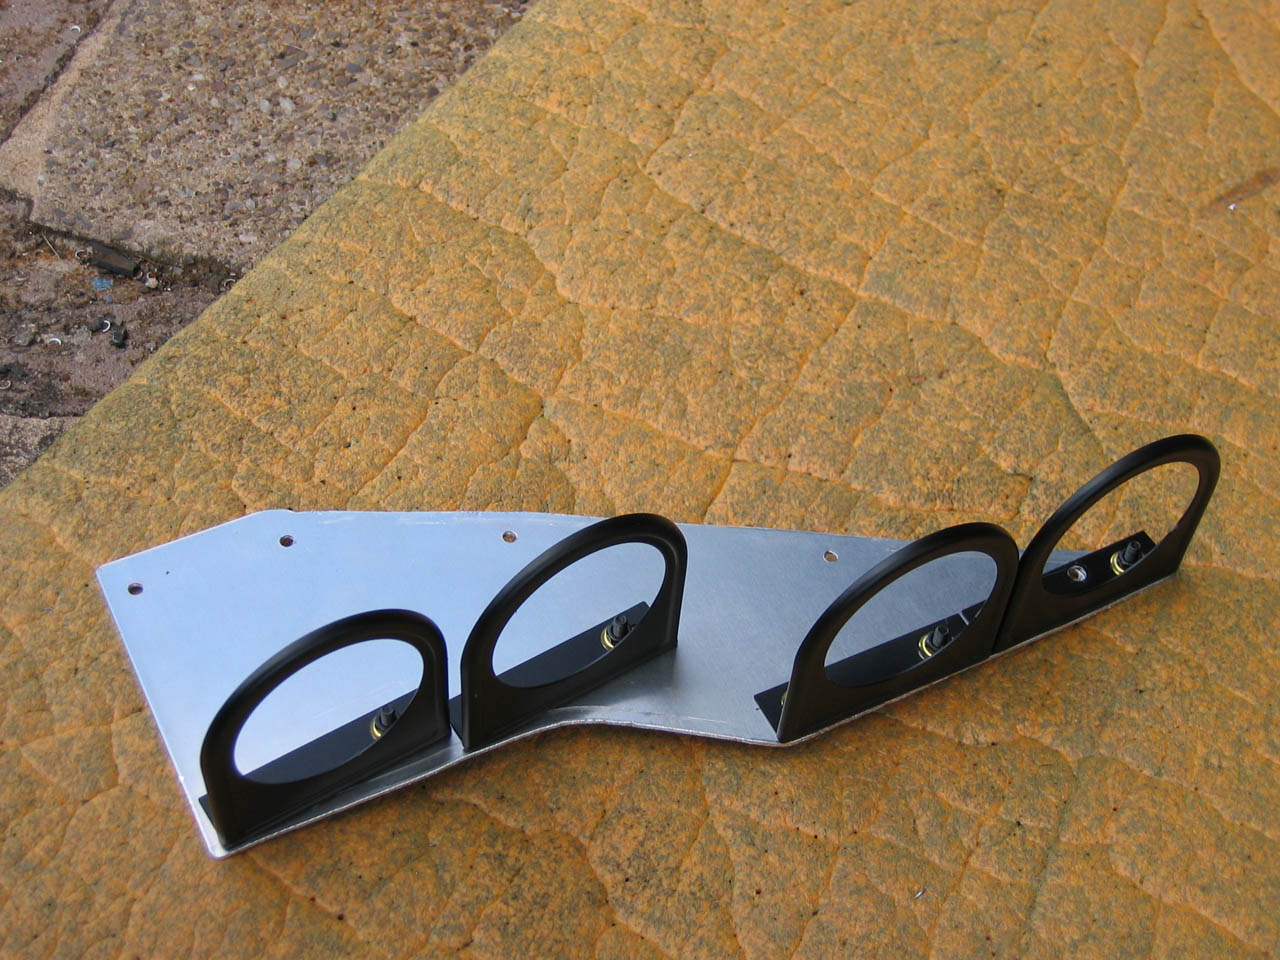
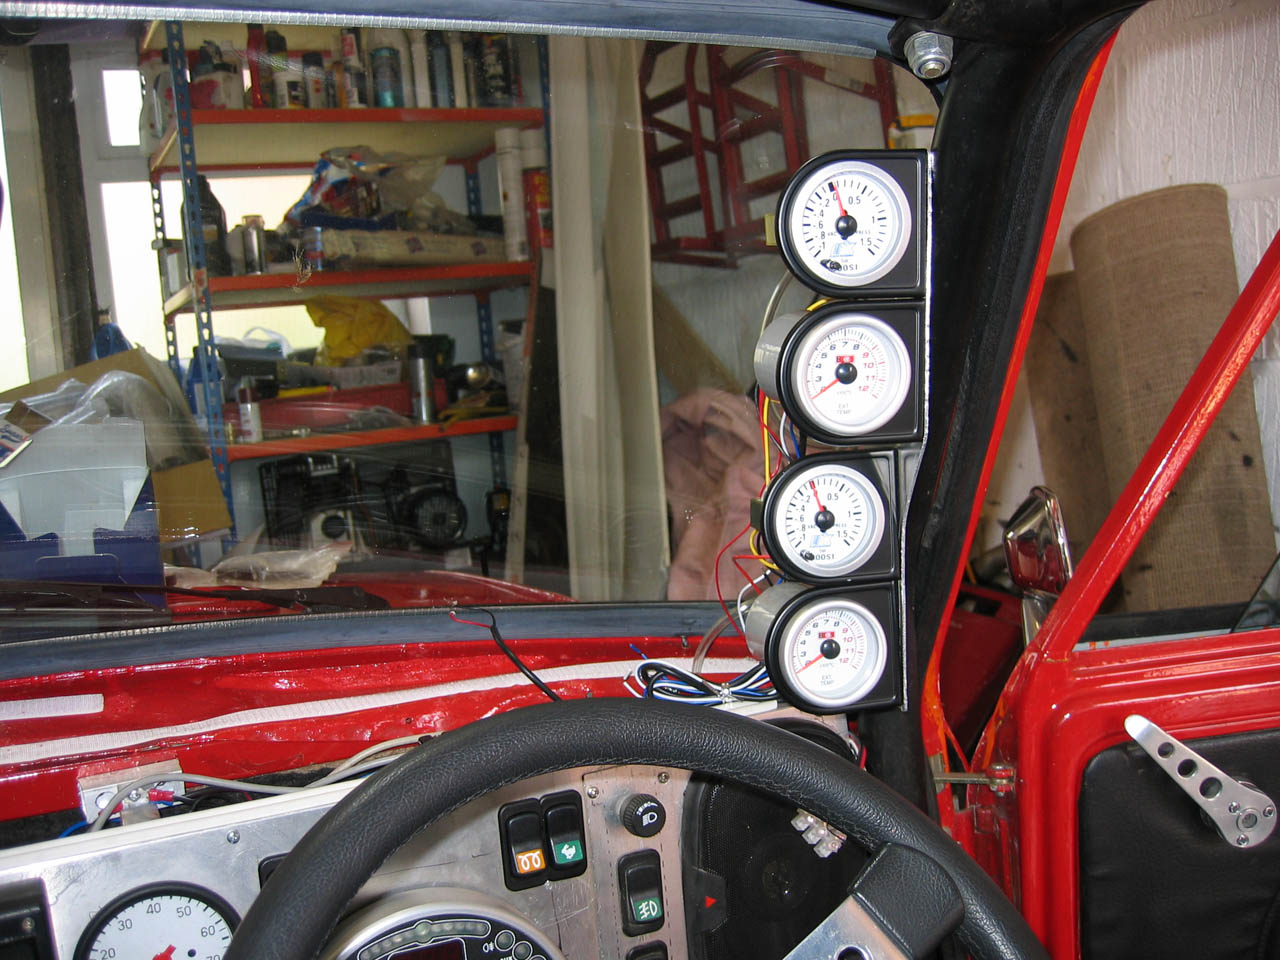
Now that the car was turbocharged it obviously needed boost pressure gauges and I also thought that exhaust temperatures would be useful. There wasn't really anywhere left space wise on the dashboard itself, I didn't want to mount them on top of the dashboard as this needs to be accessible for wiring etc. Normal gauge pods were too large to mount on the rollcage so I made up a plate and bought some small fixings which could then bolt to the rollcage.
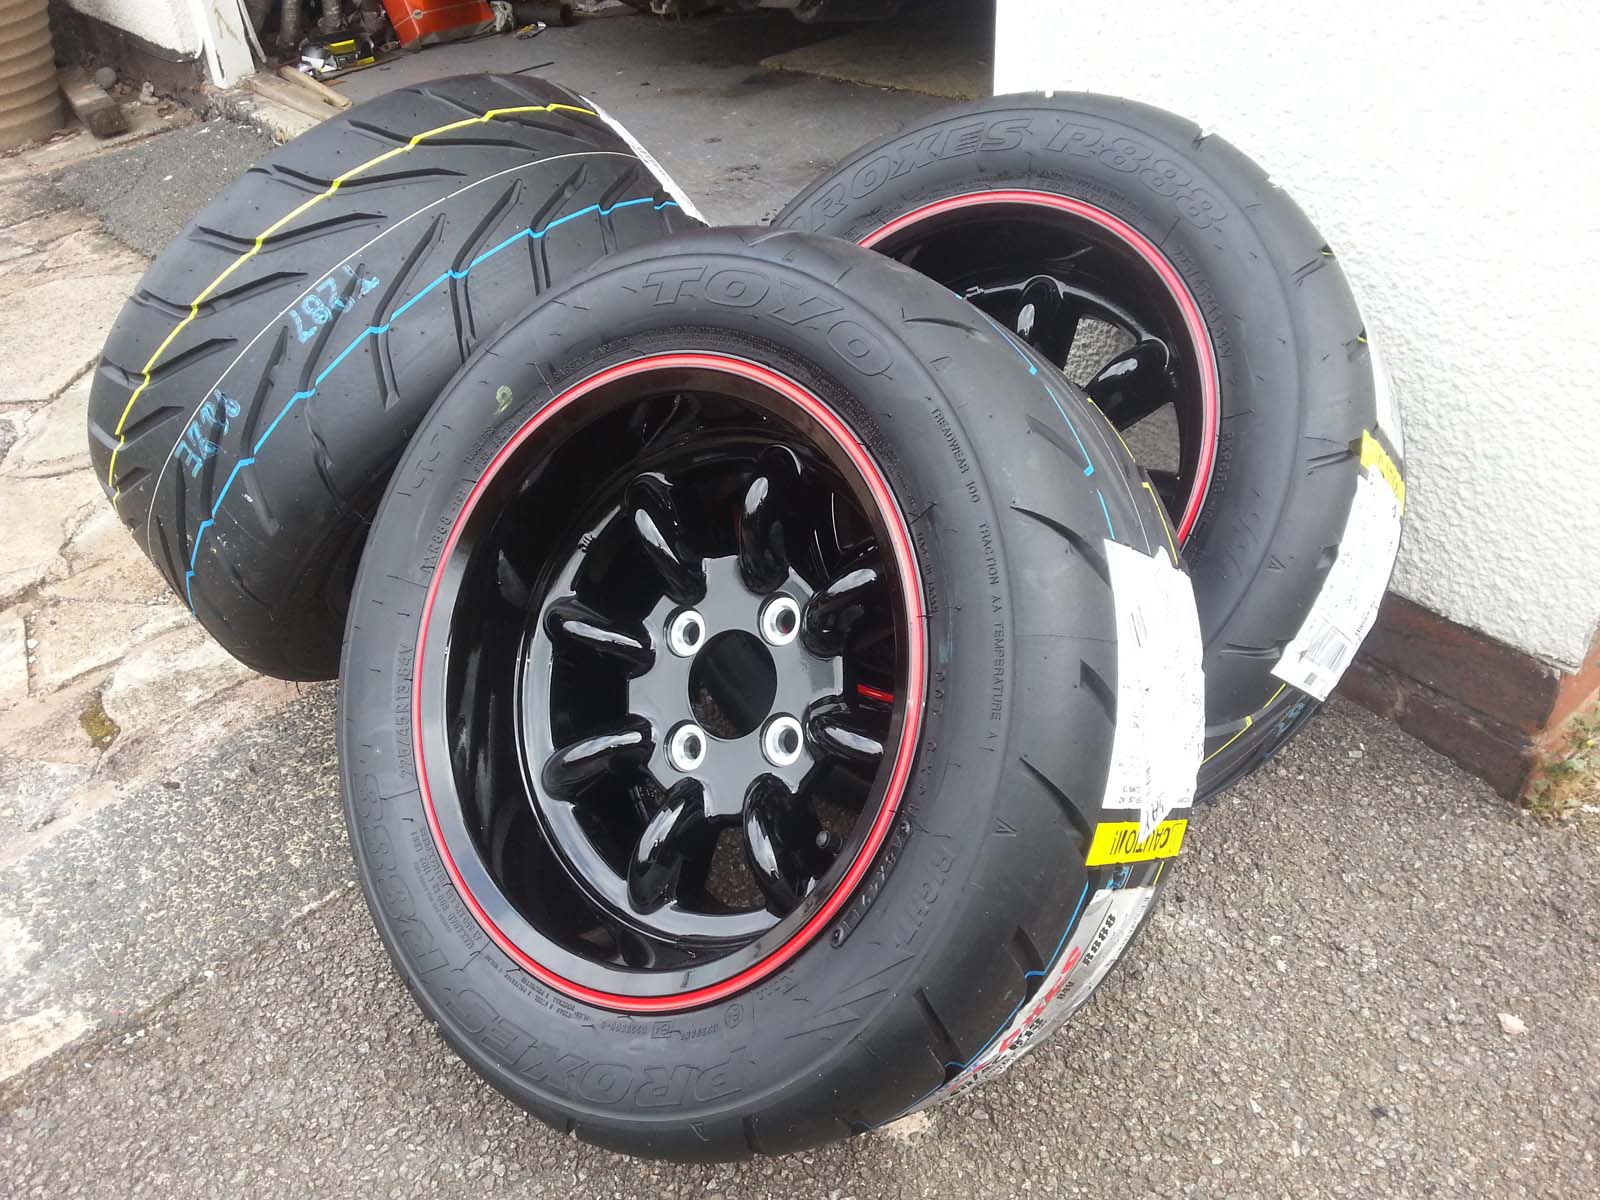
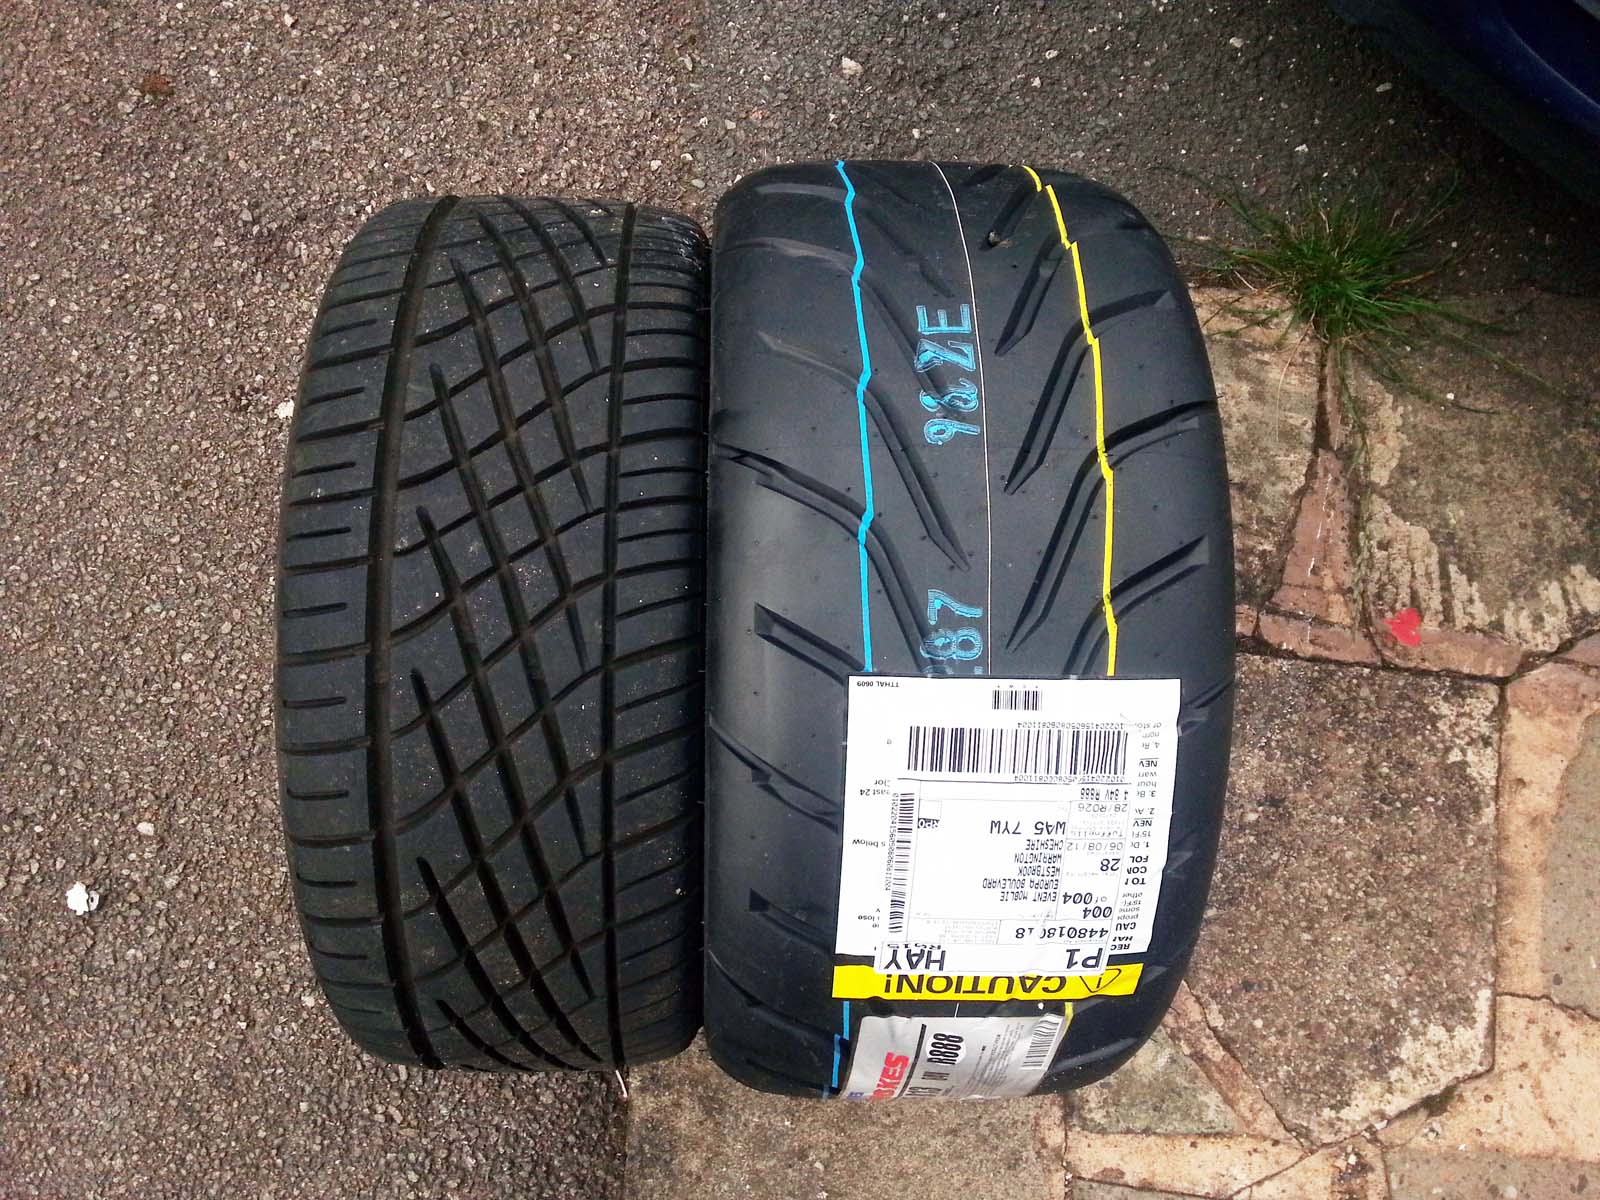
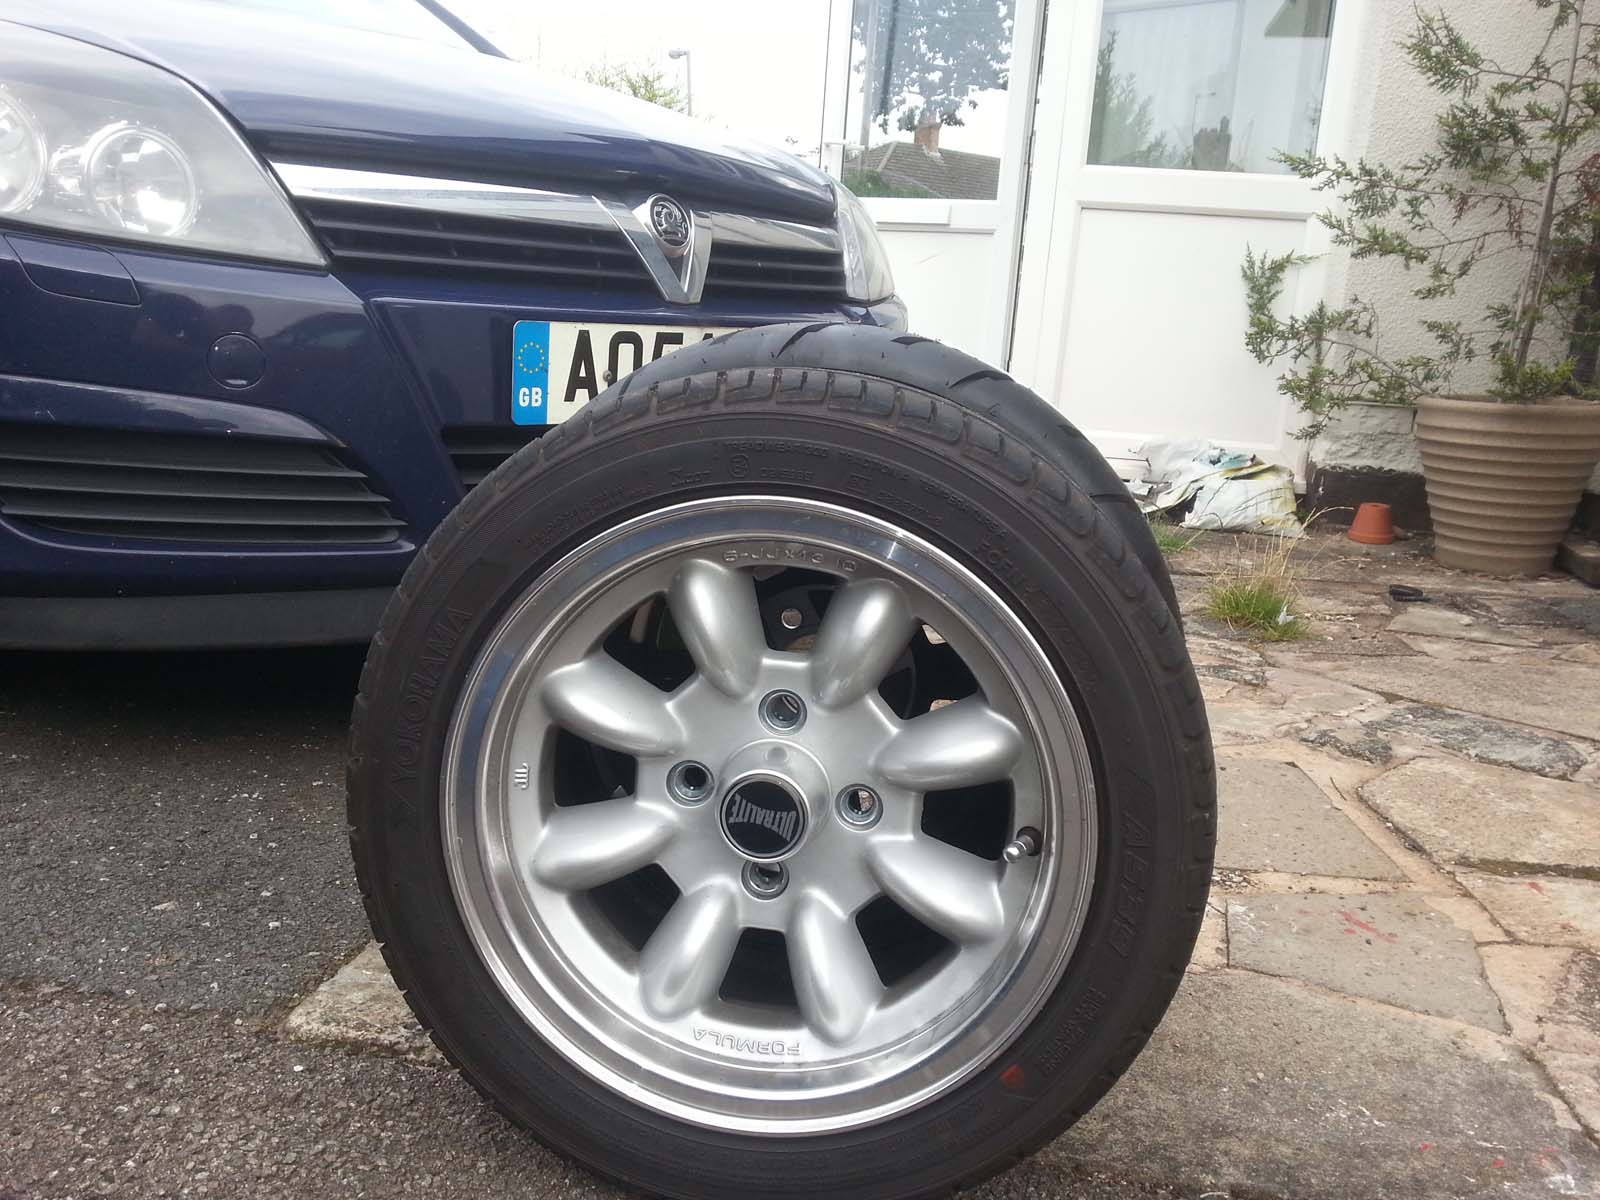
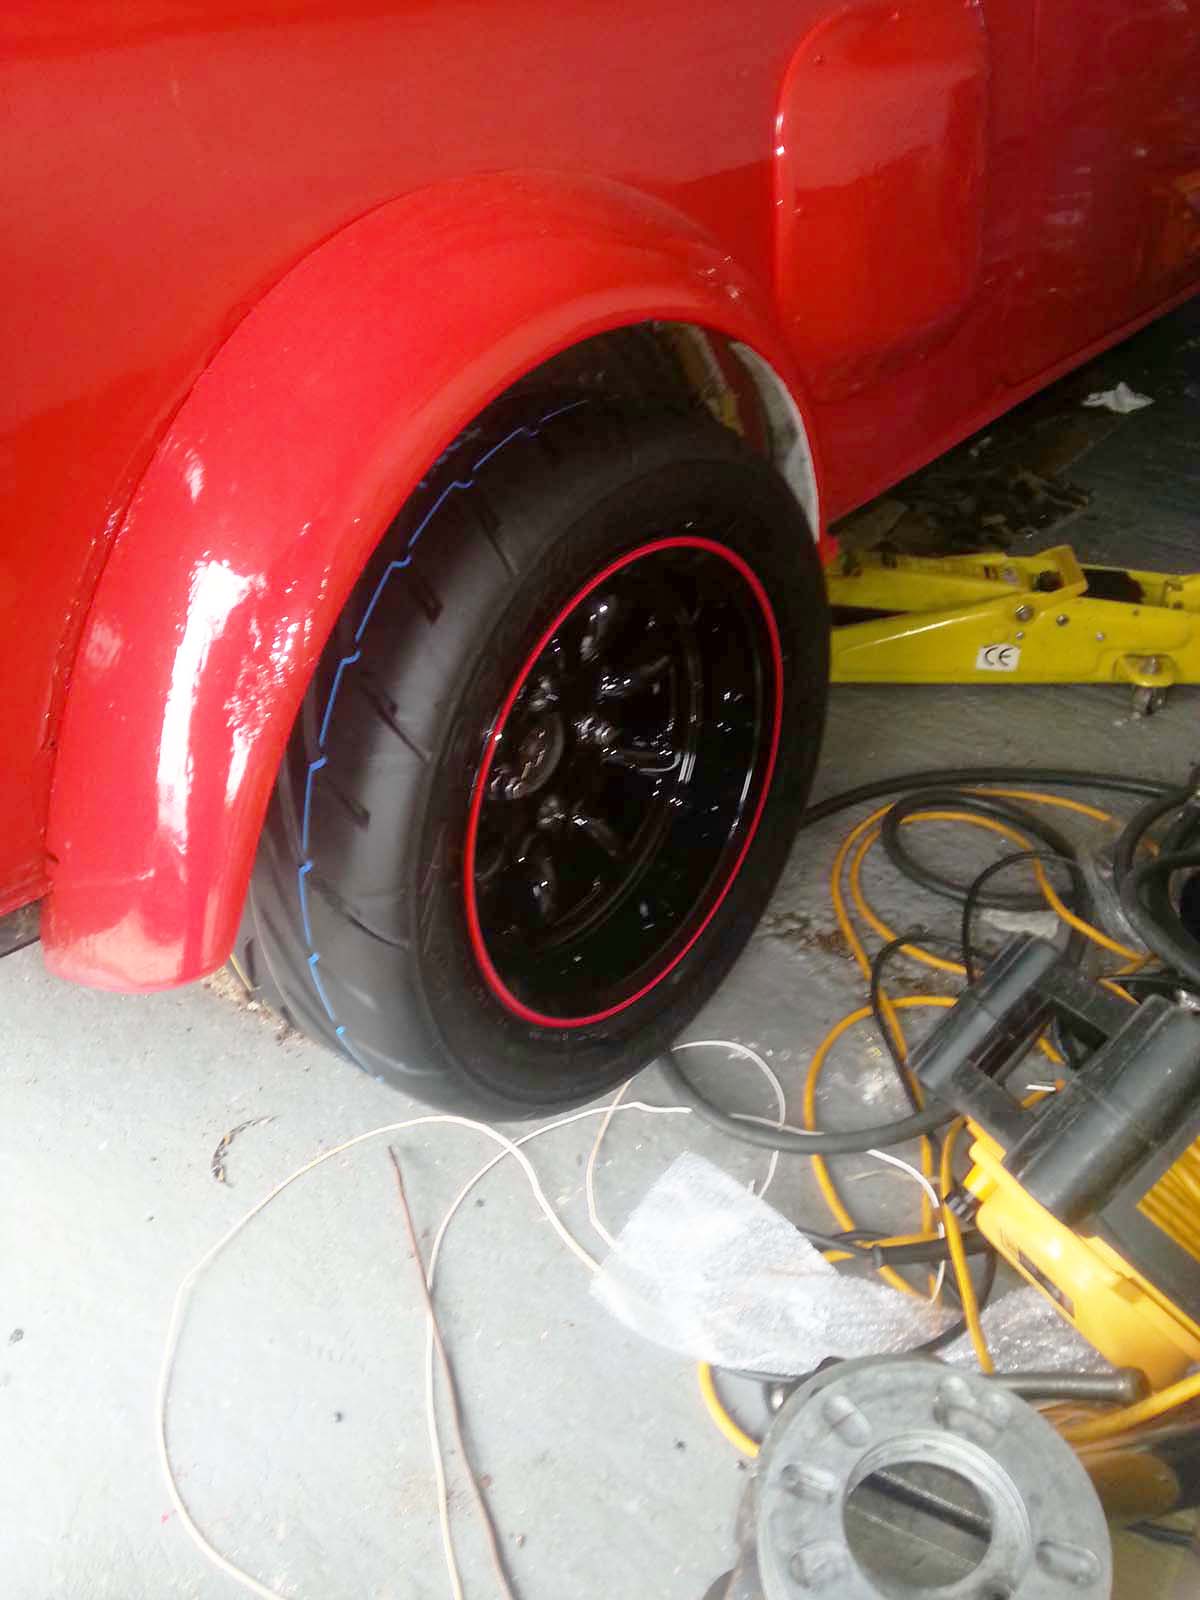
After the first racing event it was clear that there was a major issue with grip, mainly at the front but the rear also quite borderline making the traction control kick in quite a lot and waste critical tenths on the first 1/8th mile. The best upgrade would be to fit LSD's to the transmissions but is a massive stripdown\rebuild which would take me out of racing for likely over a year. A slightly less effective option (but hopefully still some effectiveness) is for stickier tyres. Previously I used Toyo 888r 185/60x13's but since fitting the auto transmissions the car had to be lowered due to driveshaft angles and these would no longer fit due to an overall diameter of 21.7" compared to 19.9" for the stock 175/50x13's. Strangely I found some alternate 888's in 225/45x13 which are actually smaller overall than the 185/60's coming in at an overall diameter of 21.0" so just over 1/2" larger on the sidewall than the 175/50's which should just about fit (they may rub on big road bumps\dips but these will only really be fitted for use on a flat track type surface). They are very wide and to clear the suspension I had to use the deep dish type wheels at 7" with -7ET and also a 1/4" spacer so they do stick out a little.
|
|